
This document is mainly about how to use our FEITIAN FIDO products with OpenPGP function
Mainly contains four parts:
- Prepare
- Use GunPG to generate secret key pairs and import smart cards
- Directly generate secret key at your FIDO device
- Other settings
1. Prepare
- Download and install GnuPG: (GNU privacy guard): a free software that implements the PGP protocol.
- iePass FIDO K44 or ePass FIDO NFC Plus
2.Use GunPG to generate secret key pairs and import to smart card
2.1 Generate a key at GunPG
Run CMD(command window ), enter:
gpg –full-generate-key
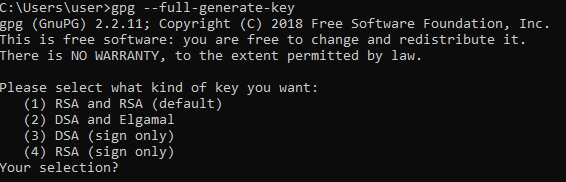
You can choose different algorithms, in this document, we will select option 1, and go with the default of 2048 bits for the next question.
Enter the bits of key:
![]()
We will enter 2048
Please specify how long the key should be valid.

Enter 0, press ‘Enter’ , and answer that the data is correct.

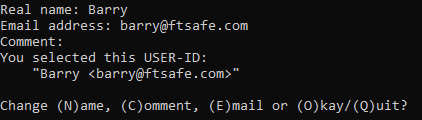
Enter the required information following the hint.
Real name:
Should be the real name associated with this key.
Email address:
Should be the email address associated with this key.
Comment:
May be a comment attached to the key if you want, or leave this empty.
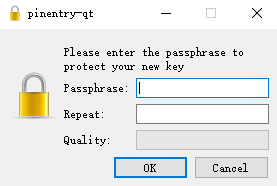
Enter O for okay, you will need to create the Passphrase.
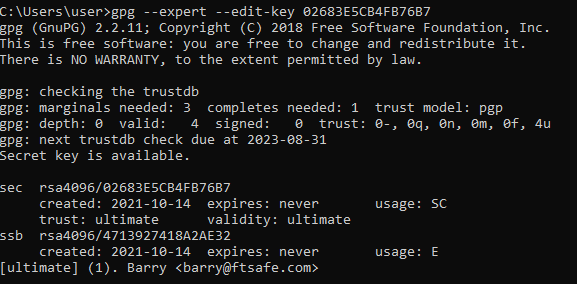
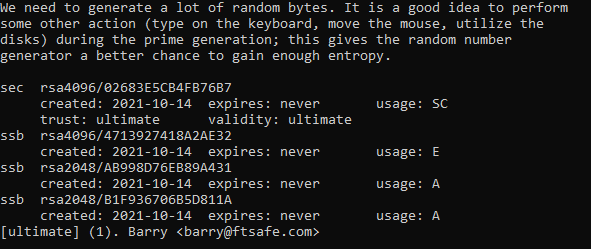
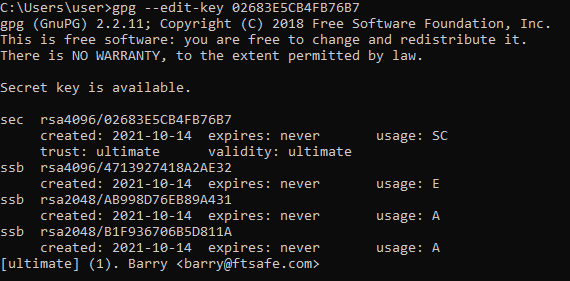
Success, you will see the following information, please remember your GPG Key name, as in white frame.

2.2 Add an authentication key
Here we will add an authentication key to the previously generated key.Enter:
gpg –expert –edit-key [your GPG key name]
[your GPG key name]is showed in the last step
Enter:
gpg> addkey
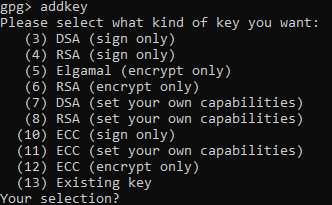
Select by your requirements. Here we select 8 to get another RSA key attached to our key.
Select A, then S, then E to get a pure authentication key. Then Q to continue.

Select 2048, enter your selection following the hint.
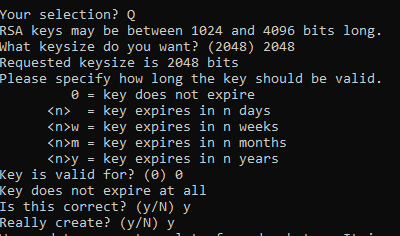
You will need to enter the passphrase you created in the previous step

Success
Enter Quit, and y to save changes and quit.
2.3 Backup
It may be important to create a backup of your key. Enter:
gpg –export-secret-key –armor [your GPG key name]
You will need to enter the Passphrase.
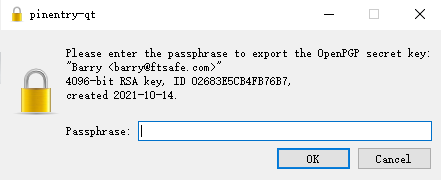
If success, the PGP private key will showed up, you can copy and save it.
2.4 Importing the key
Now you can import the PGP key to FEITIAN Security devices. Insert your FIDO devices(in this case, we use ePass FIDO NFC plus – k9 plus)Enter:
gpg –edit-key [your GPG key name]
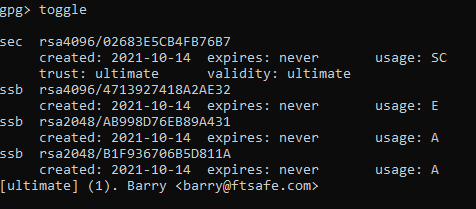
Enter:
gpg> toggle
Enter:
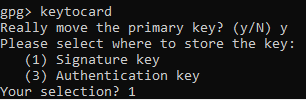
gpg> keytocard
Really move the primary key? (y/N) y
Your selection? 1
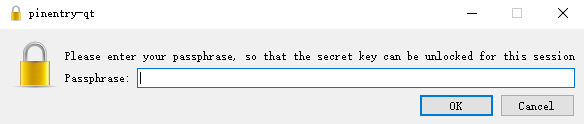
You will need to enter your Passphrase
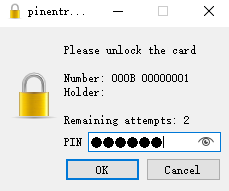
Sometimes you will also need to enter the Admin PIN[default:12345678] which could be changed. Please see chapter 4 Other settings
Here we’ve just moved the primary key to the PGP Signature slot of k9 plus
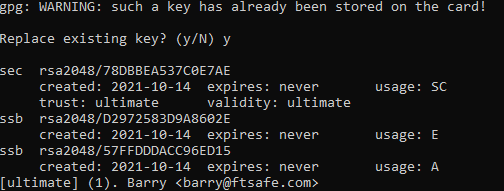
Now move the Encryption key and Authentication key to k9 plus as well(same operation):
gpg> key 1
gpg> keytocard
Your selection? 2
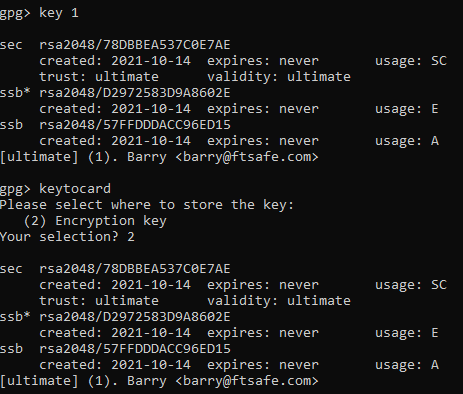
gpg> key 1
gpg> key 2
gpg> keytocard
Your selection? 3
gpg> quit
Save changes? (y/N) y
Note: at this time, the secret key has been imported into the smart card. You can use the secret key to sign and encrypt mail.

3. Generating Your PGP Key directly on FEITIAN devices
Except generating at GunPG, you can also directly generate PGP key in our devices.
Warning: Generating the PGP our products ensures that malware can never steal your PGP private key, but it means that the key can not be backed up so if your FEITIAN security key is lost or damaged the PGP key is irrecoverable!!
Insert the k9 plus into the USB port if it is not already plugged in.
Open Command Prompt (Windows) or Terminal (macOS / Linux). Enter:
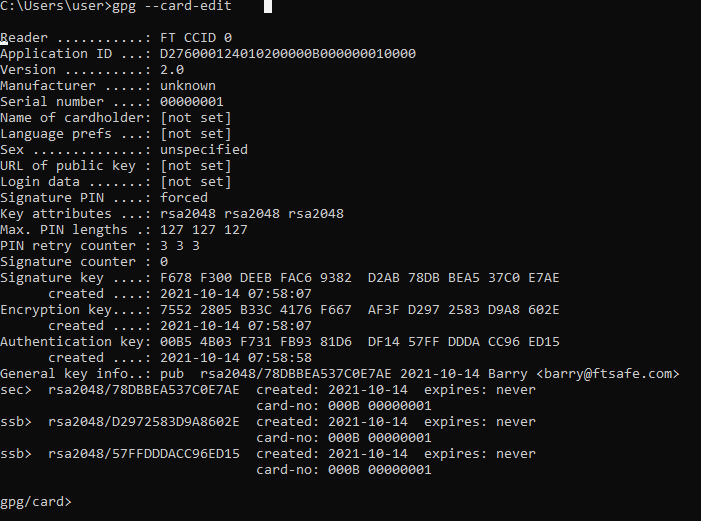
gpg –card-edit
At the gpg/card> prompt, enter:
admin
If you want to use keys larger than 2048 bits, enter:
key-attr
Enter the command:
Generate
You may need to enter the Admin PIN[default:12345678] or unblock PIN[default:123456]
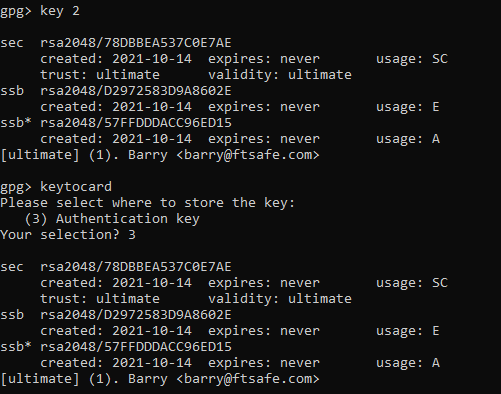
When prompted, specify if you want to make an off-card backup of your encryption key.
Note: This is a shim backup of the private key, not a full backup, and cannot be used to restore to a new key
Specify how long the key should be valid for (specify the number in days, weeks, months, or years).
Confirm the expiration day.
When prompted, enter your name.
Enter your email address.
If needed, enter a comment.
Review the name and email, and accept or make changes.
4. Other Settings
Insert k9 plus. Enter:
gpg –card-edit
To allow admin functions such as generate on smart card, enter:
gpg/card> admin
![]()
To change related password, enter:
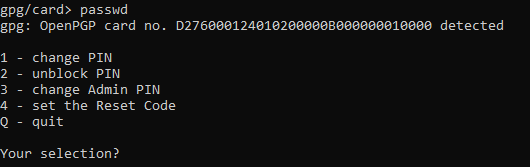
gpg/card> passwd
You can also change other information using the following commands and following the hint.
gpg/card> name
gpg/card> lang
gpg/card> url
gpg/card> sex
Sex ((M)ale, (F)emale or space): m
gpg/card> login
Login data (account name): jas
After configuration, enter:
gpg/card> quit