
Overview
The name of this tool used to be ‘FEITIAN OTP Personalization Tool’, since Oct 2022, we decide to change it to ‘FEITIAN Authenticator Mass Programmer’.
Some of our Fido devices have OTP applications. Users can easily configure OTP for multiple devices through this tool.
Supported platform: Windows
Supported devices: ePass FIDO, ePass FIOD-NFC, iePass FIDO, ePass FIOD-NFC Plus.
Supported functions: Read the basic information of the device; configure whether the OTP obtained by touching button will automatically end with ‘Enter’; burn seeds, etc.
DOWNLOAD IT HERE
Hash: 3E45B25DCE7808D3394208497599535A1A433490
Get Started
1. Home page
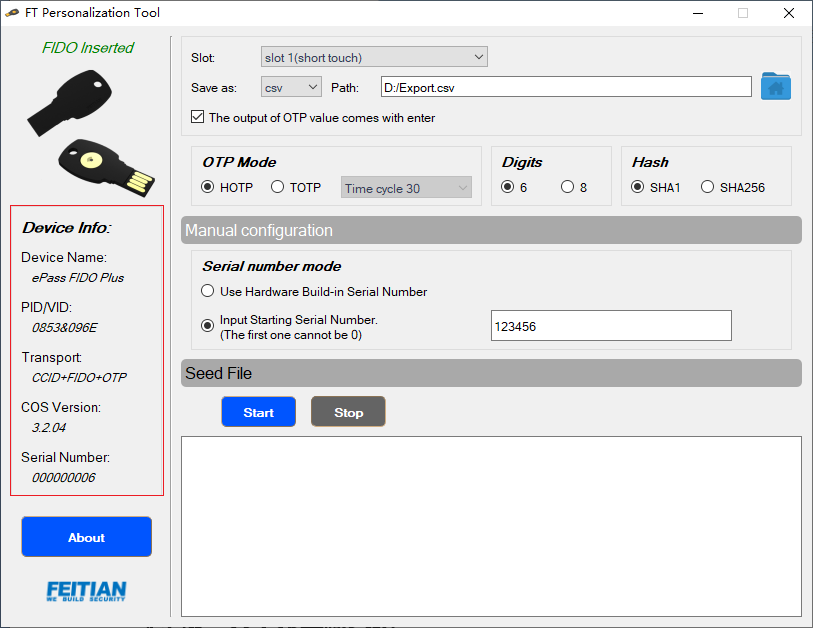
Open the tool, user will see “No Fido Inserted” when the Fido device with OTP application is not inserted or the inserted device does not support OTP.
If more than one keys are inserted, user will see “Multiple Fido Inserted”. Please remove the unneeded one.
When a Fido device with an OTP application is inserted, “Fido Inserted” is showed. And the tool can successfully obtain the basic information of the device.
2. Introductions of Batch Personalization
2.1 Set slots
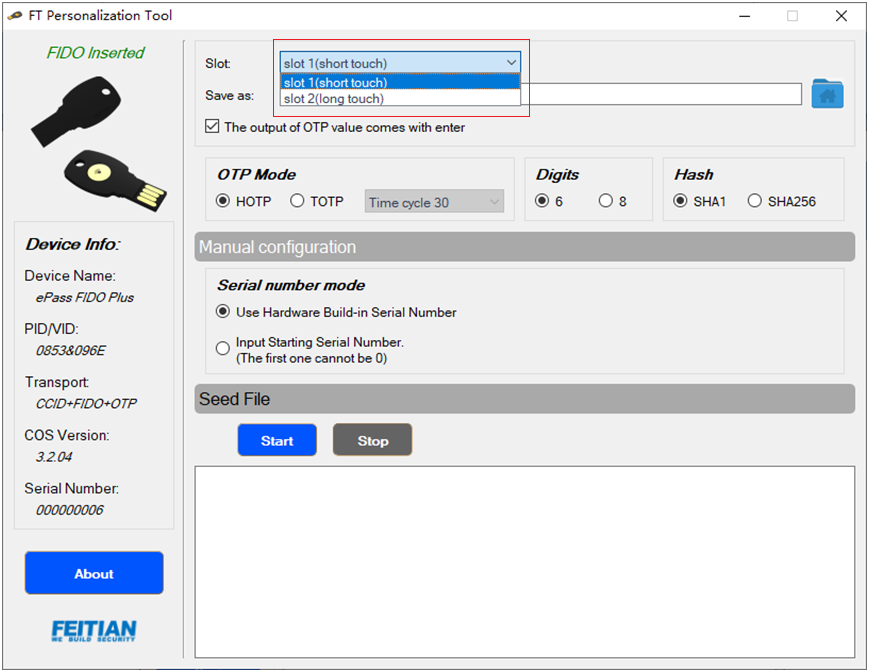
Select a slot in the drop-down box: slot 1 (short touch) or slot 2 (long touch).
Slot 1: short press the chip of the device to get the OTP value.
Slot 2: long press the chip of the device, you need to touch for three seconds to get the OTP value.
For devices that only support the configuration of slot 1, the selection box cannot be clicked, and the default is slot 1.
2.2 Set log output path
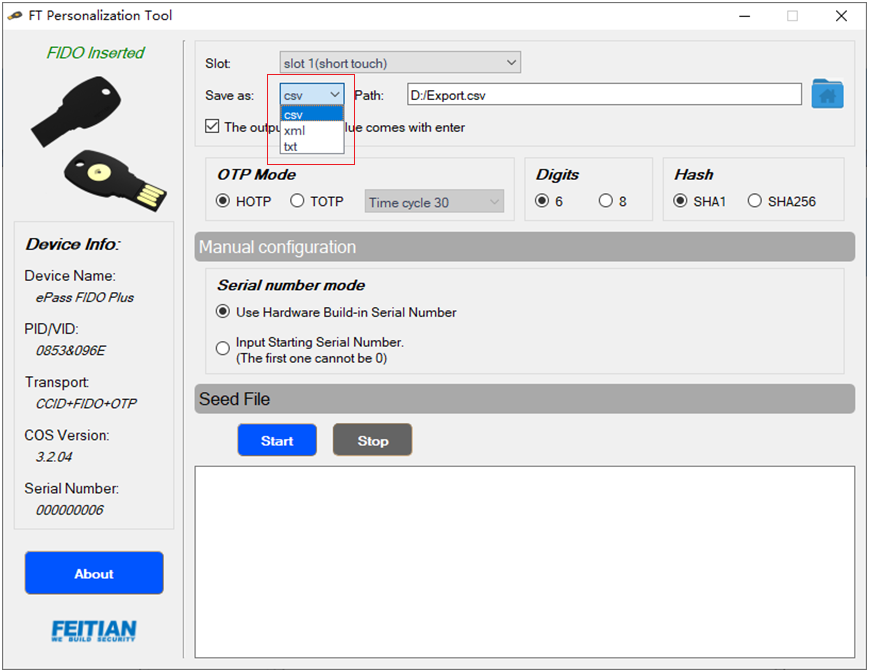
There are three formats for log file: CSV, XML and TXT. After selecting the file type you want to save as, click the rightmost button to select the log output path.
2.3 Set whether the touching required OTP value comes with ‘Enter’
When the check box “The output of OTP value comes with enter” is selected, the OTP obtained by touching the key ends with ‘Enter’.
In the non selection state, the OTP obtained by touching the key does not end with ‘Enter’.

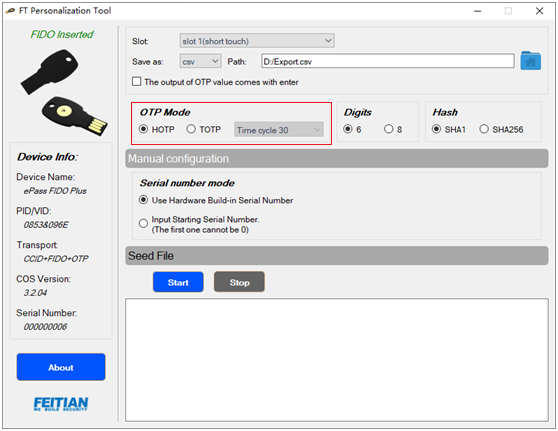
2.4 Set OTP type
The tool supports HOTP and TOTP. When selecting TOTP, you need to specify the OTP interval(30s or 60s).
2.5 Set the number of OTP digits
Set the OTP value length get by touching the key, 6 digits or 8 digits.
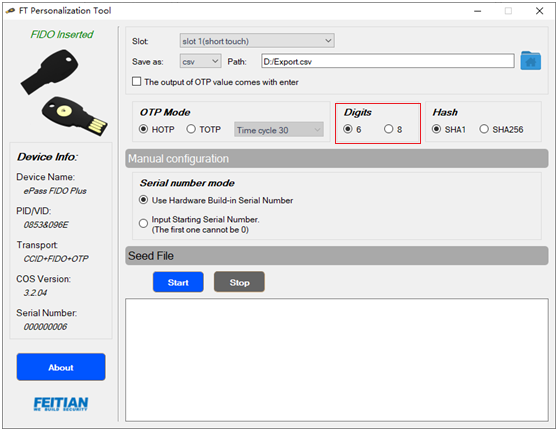
2.6 Set the hash algorithm
Set The hash algorithm used in internal OTP calculation. Supports SHA1, SHA256.

2.7 Set OTP name and secret key
2.7.1 Configure manually
1)Use the serial number inside the device.
In this way of batch personalization, the serial number inside the device is used as the OTP name, and the random number generated by the tool is used as the secret key, and they are composed as the seed and are written to device.

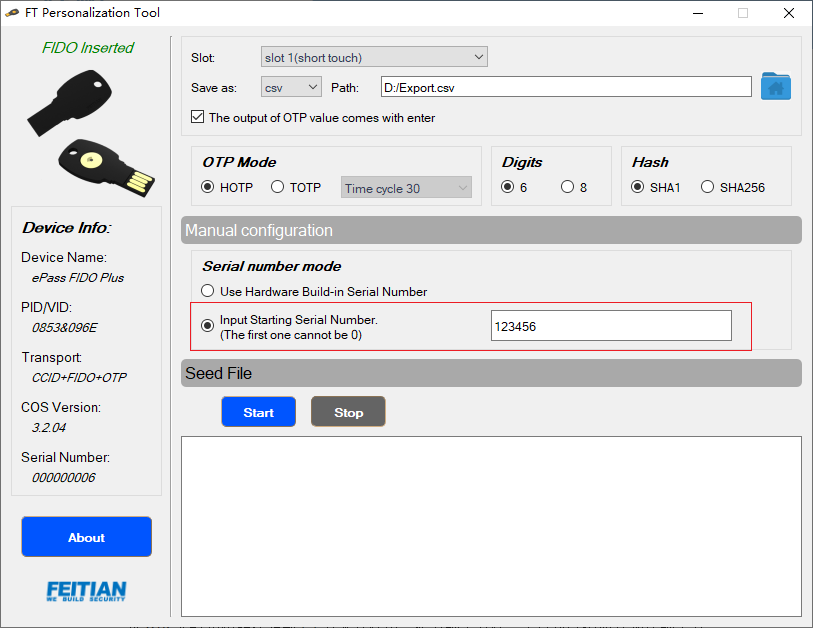
2)Customize serial number
In this way of batch personalization, the designated serial number could be used as the OTP name, and the random number generated by the tool is used as the secret key to compose as the seed and write to device. After each successful personalization, the serial number will be incremented to ensure that different devices have different seeds. Note that if your input is not following the rules, it will not show up.
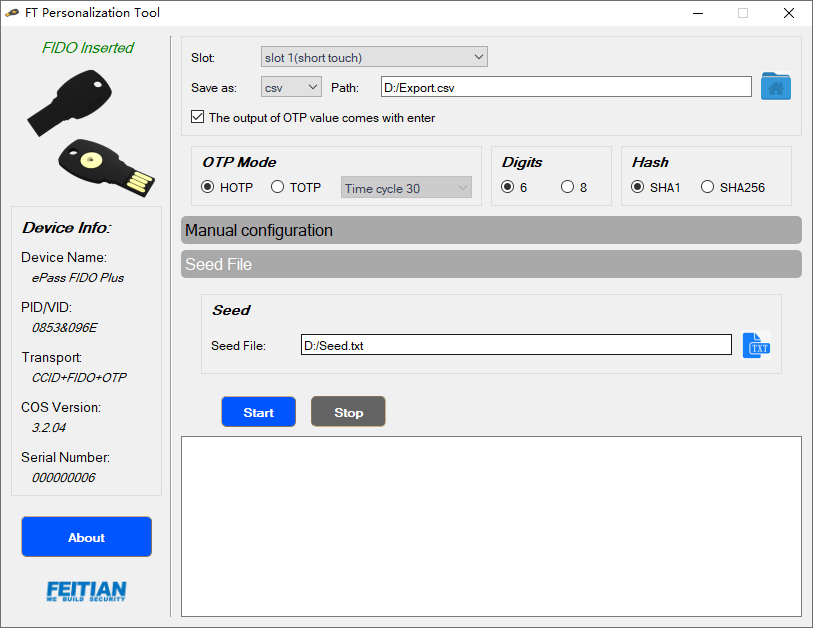
2.7.2 Using seed files
Save the OTP name and key to the TXT text file as the seed file. The tool can read and load the seed file to get the seed data.
In batch personalization, the corresponding secret key is searched from the seed data according to the serial number of the inserted device and then the seed is written to the device.
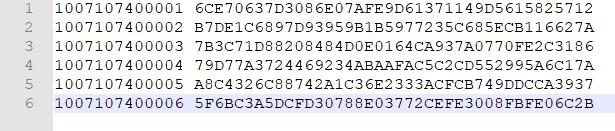
The seed file format is as follows. Each line contains the OTP name and the secret key separated by a ‘space’.
3. Start Batch personalization
Click the “Start” button to start batch personalization.
1)If “The file name should end with CSV” appears at the bottom of the interface, it means that the log output file is not configured.
2)If “The length of the input serial number must be [4, 16]” appears, it means that the serial number is not configured or not qualified.
3)If “No valid seeds were found!” appears, it means that no valid seed file is configured.
4)When the following interface appears, personalization begins. You need to re-plug in the Fido device.
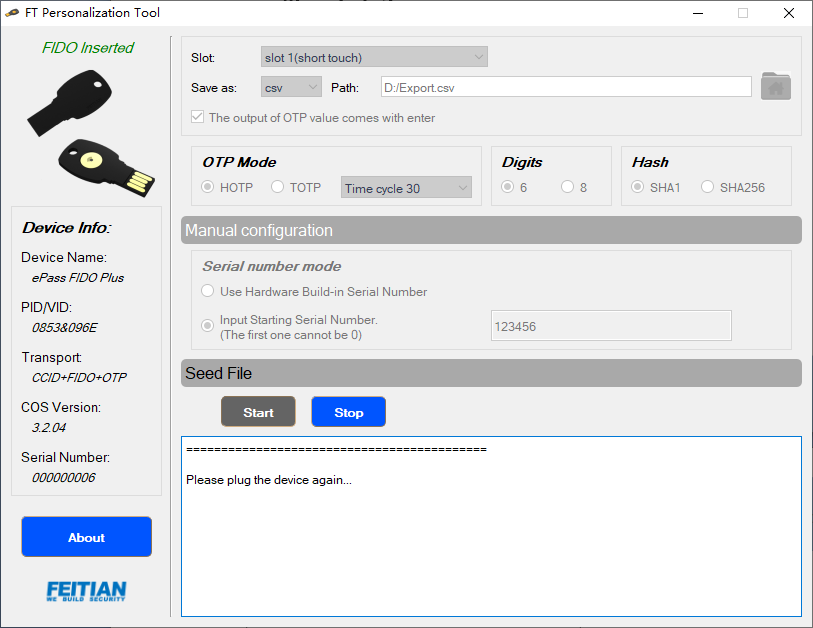
The following waiting box will be prompted after plug-in. You need to touch the button on the device to complete personalization.

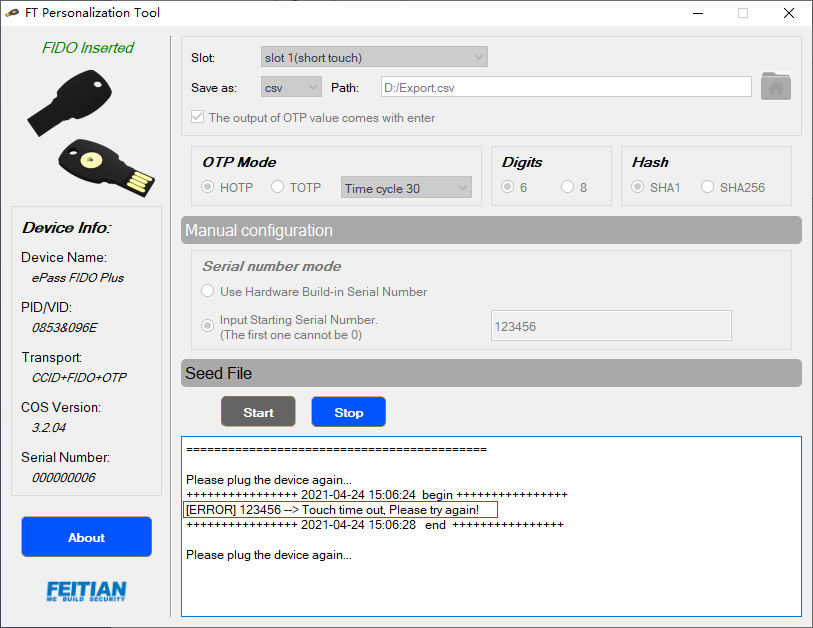
If the following error is prompted, it means you didn’t touch the key in time. You need to unplug the current device and try again.
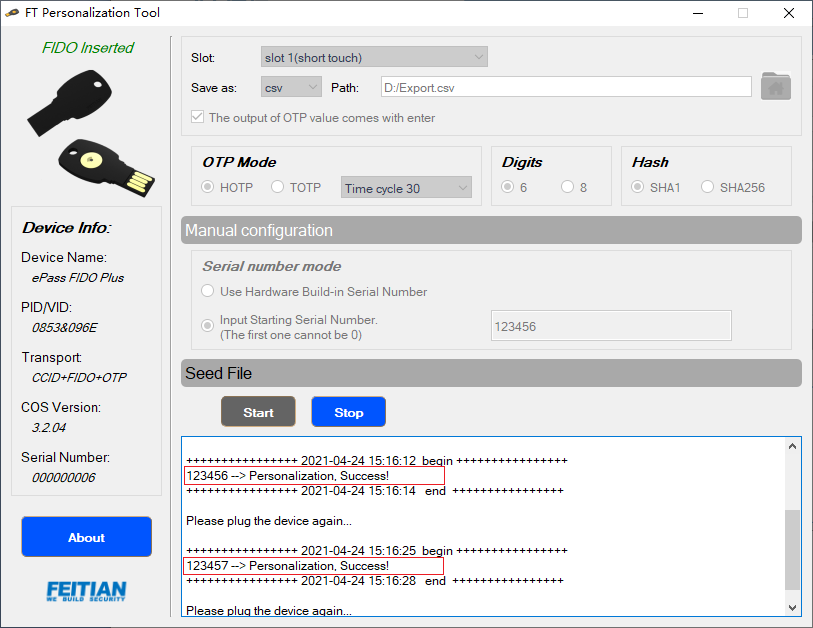
Personalized successful interface for two consecutive devices!
4. End batch personalization
Press the “stop” button to end the personalization process. You can go to the log output path to view the records. The output formats of the three log files are as follows:
CSV log:

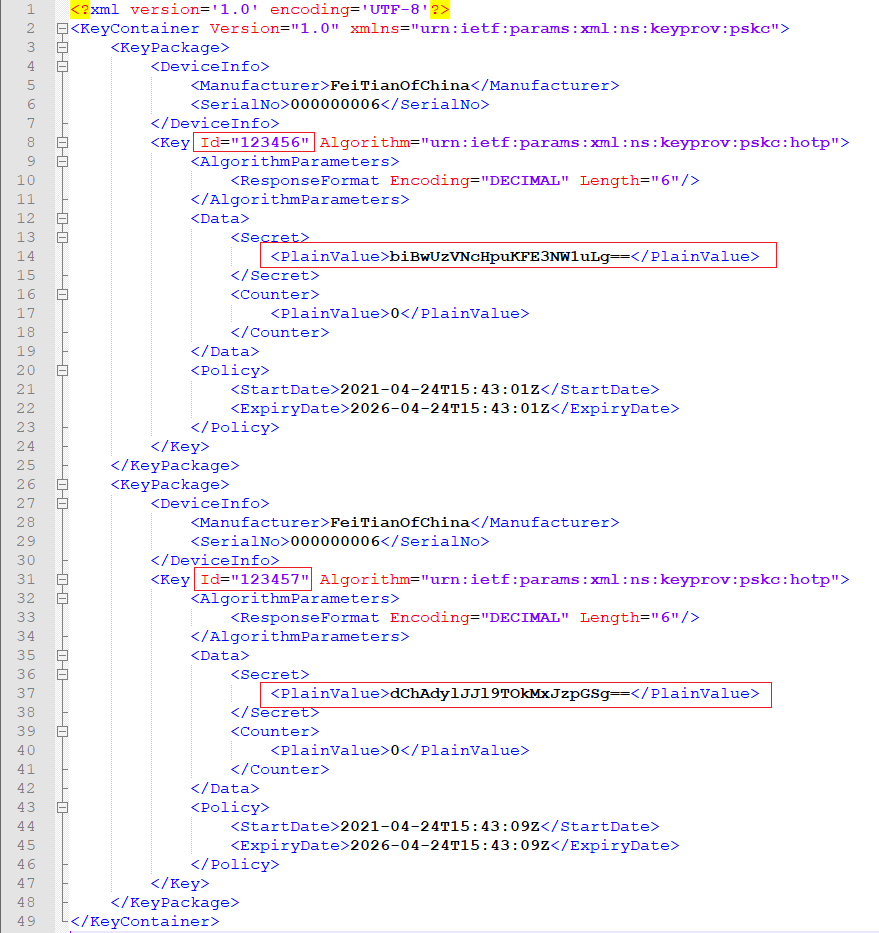
XML log:
Note: The plainvalue element is the secret key in base64 encoding format.
Txt log:
![]()