
This document is mainly about how to configure a CA(Certificate Authority) at Windows Server.
The guidance is only for reference. Users should configure their servers and clients according to their organisation’s security requirements!
Prepare:
- VMware or other VM workstations
- Windows server(2008, 2012 or 2016). In this document Windows Server 2016 is used.
Get Started:
First, you need to download an image of Windows Server 2016 and install the virtual machine to prepare for the installation of CA, it is recommend to login as the Administrator of the Windows Server(must set admin password first).
Before installing CA, you should first install and configure domain services. Otherwise, the installation of CA cannot can’t process normally.
- Note that other services not provided by the host cannot be installed before installing and configuring domain services. Otherwise, the domain services will not be configured correctly.
Next, install and configure
1、 Domain services
(1) Installation
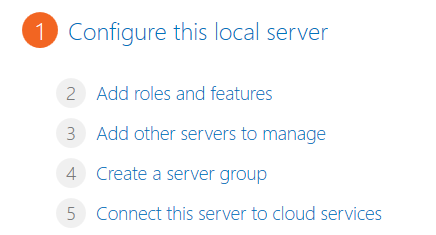
1) Open the server manager, as shown below:
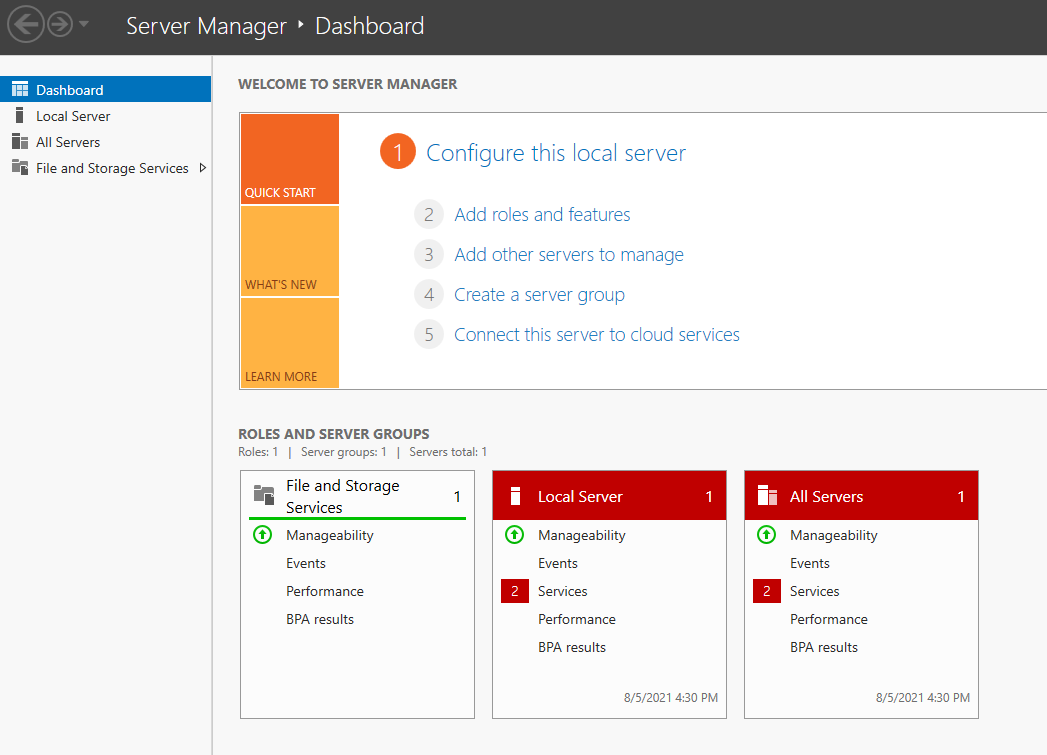
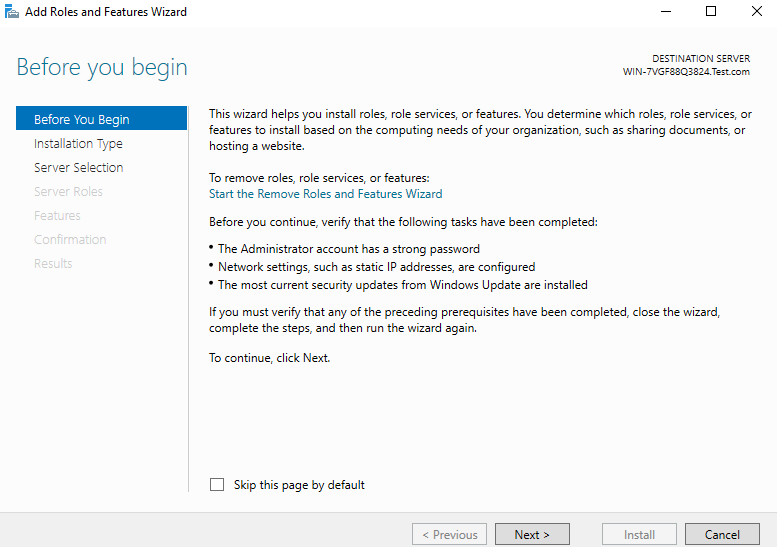
2) Click ‘Add roles and features’, and click ‘Next’
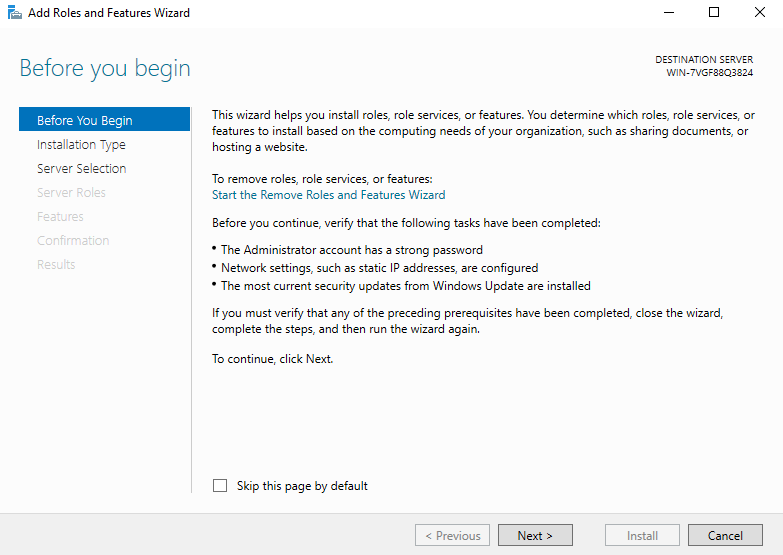
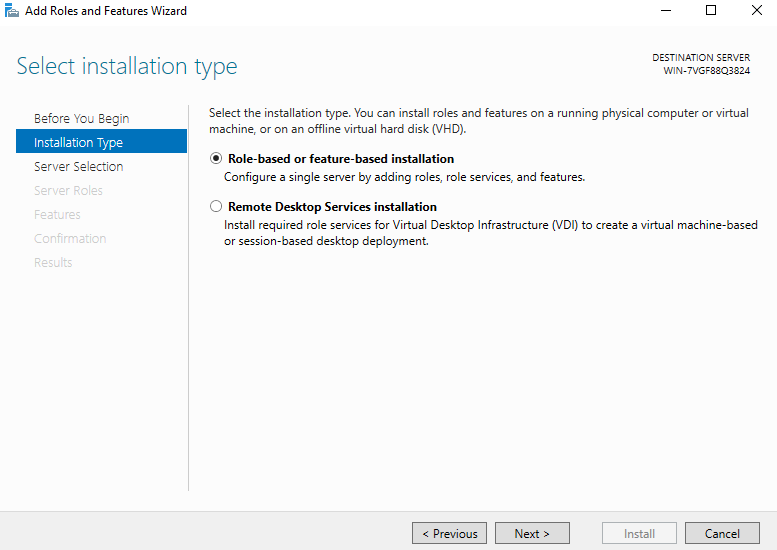
3) Select ‘Role based or feature-based installation’ and click ‘Next’
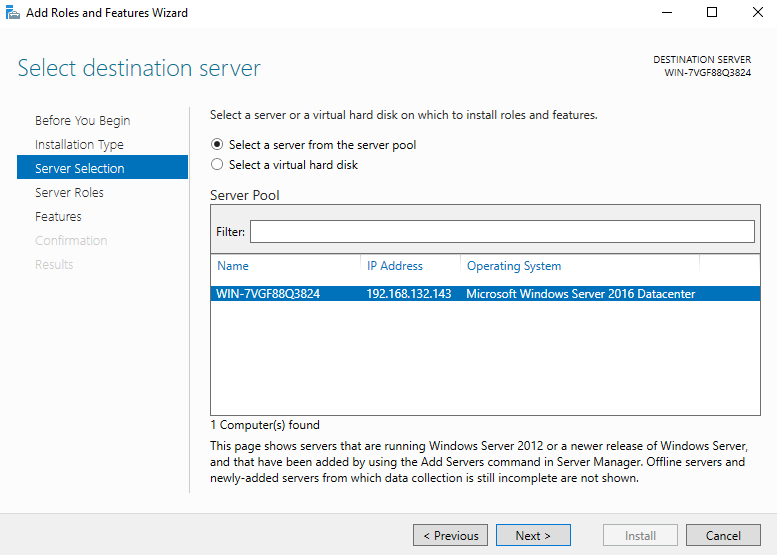
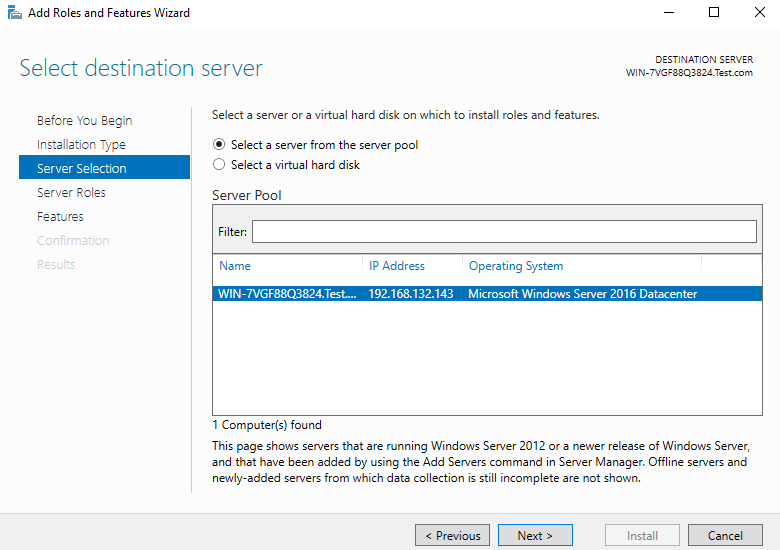
4) Select a server from the server pool. It is local machine by default, so go to the next step directly
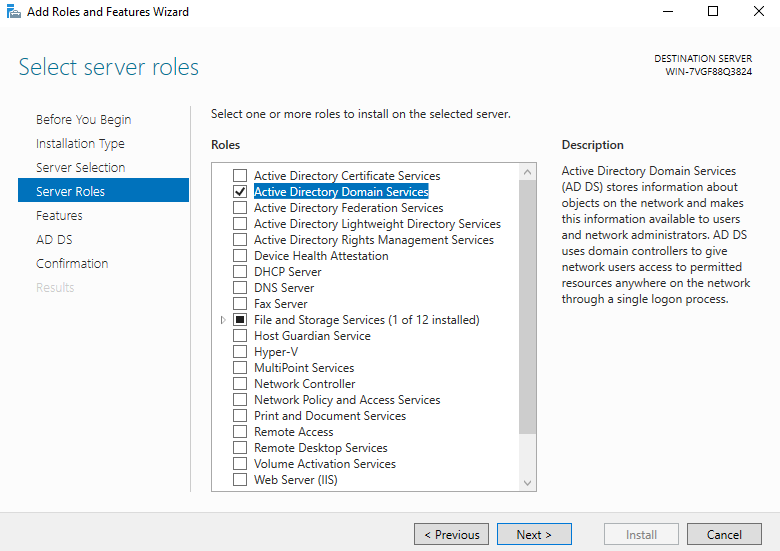
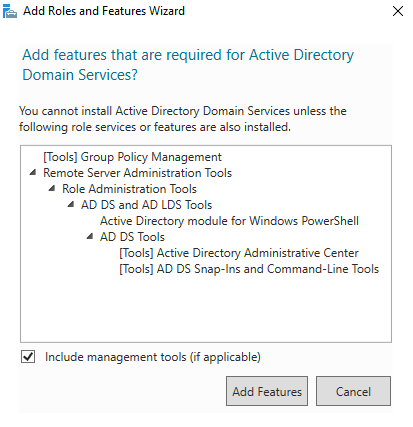
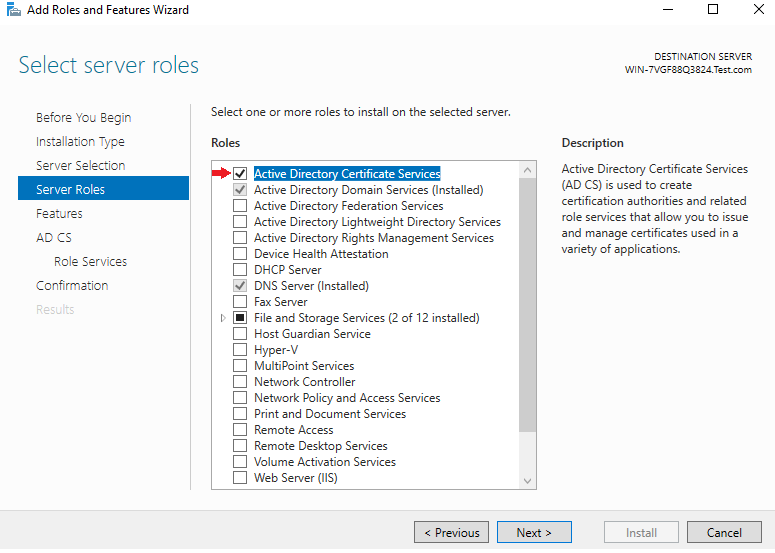
5) Select ‘Active Directory Domain Services’ and add default features
 、
、
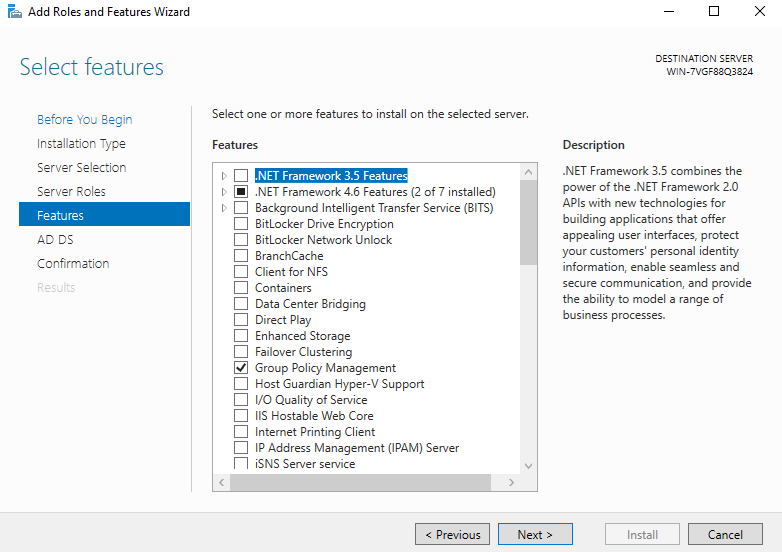
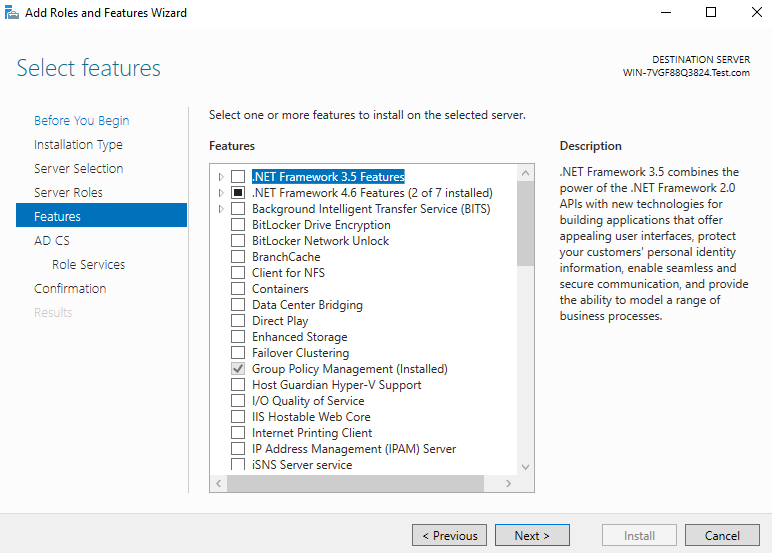
6) Directly select the next step
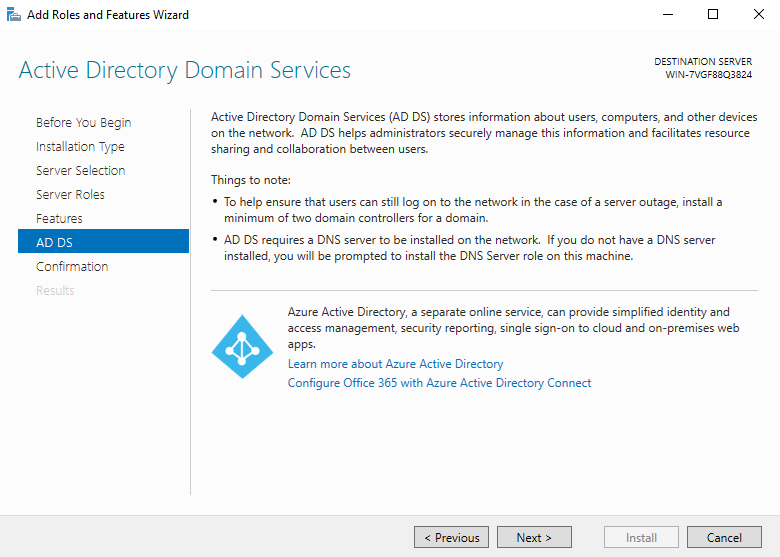
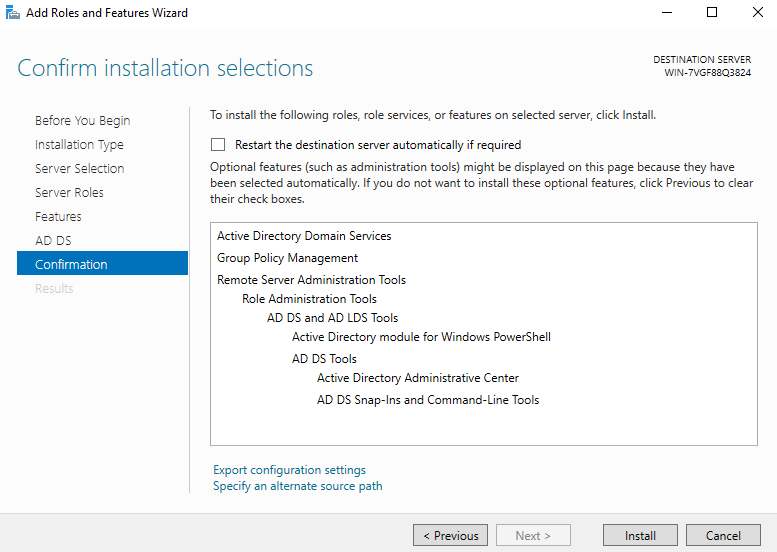
7) Select next directly in the ad AD DS interface, and then confirm the installation selection in the interface and click ‘Install’
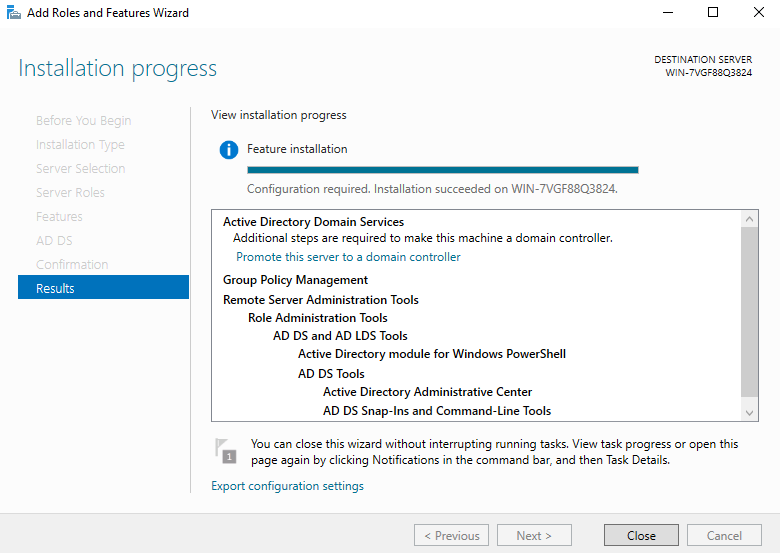
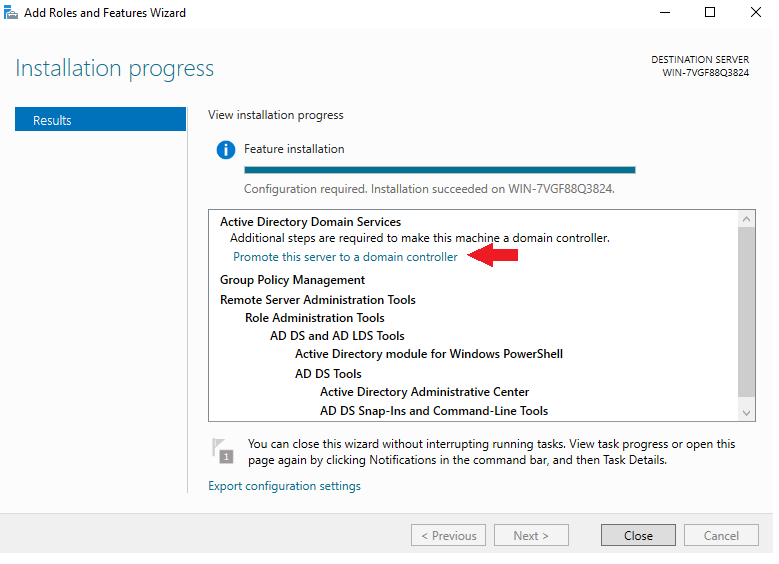
8) Installation succeed, ready for configuration
(2) Configuration
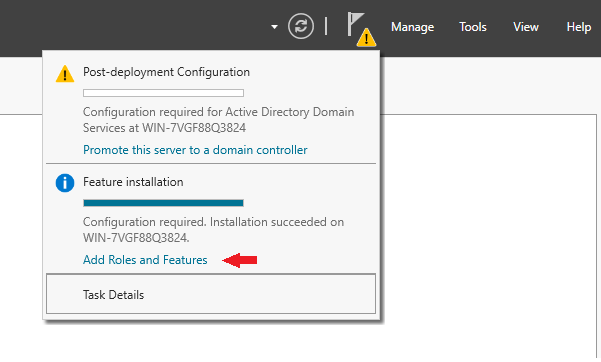
1) Click the yellow flag in the upper right corner, click ‘Add Roles and Feature’, the interface will appear, and then click ‘Promote this server to a domain controller’
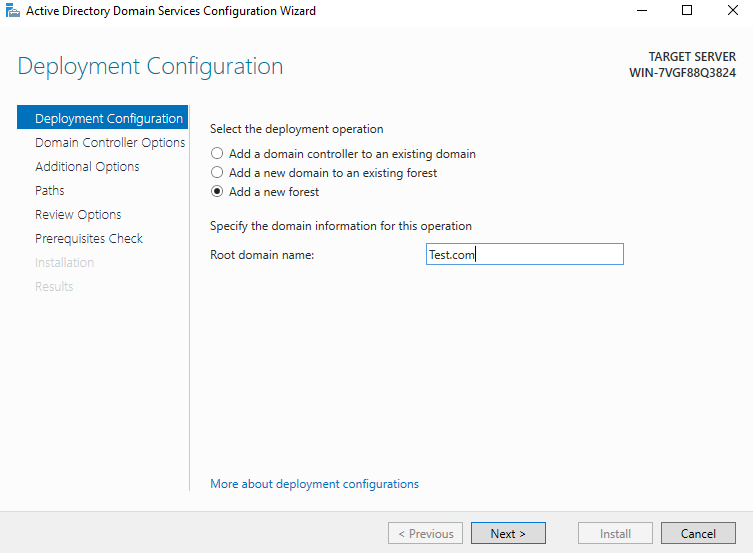
2) Select ‘Add a new forest’, and set a domain name by your will, click ‘Next’
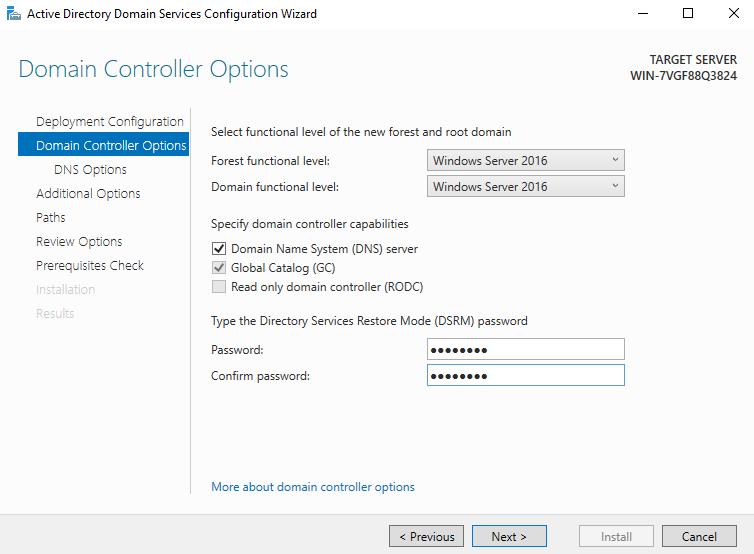
3) Then set the password and click ‘Next’. Note that the previous function level must be the model of the server host. By default, it will be your own server, but sometimes it will be different
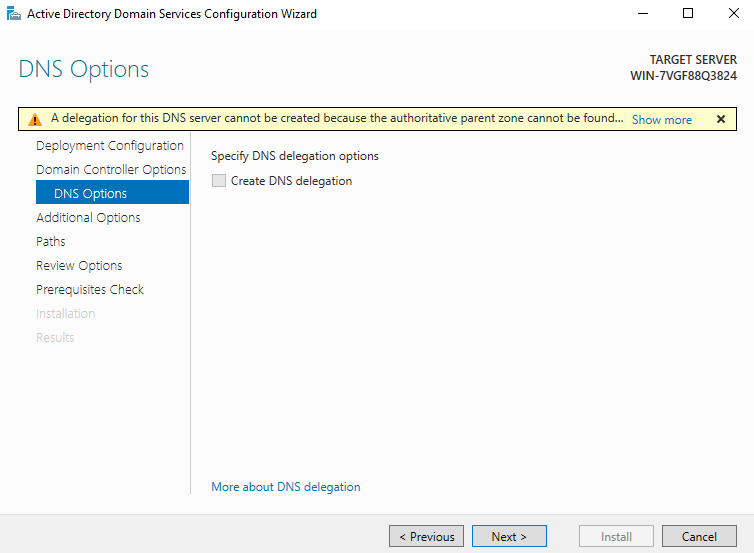
4) The DNS setting prompt cannot be set. Click ‘Next’ directly. The DNS server will be installed automatically by default in the later installation process
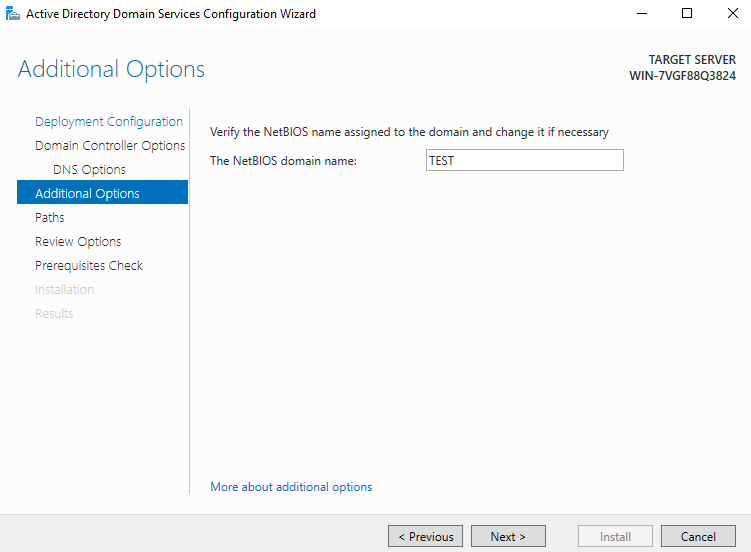
5) The NetBIOS name system will be set by itself, and you can directly go to next step
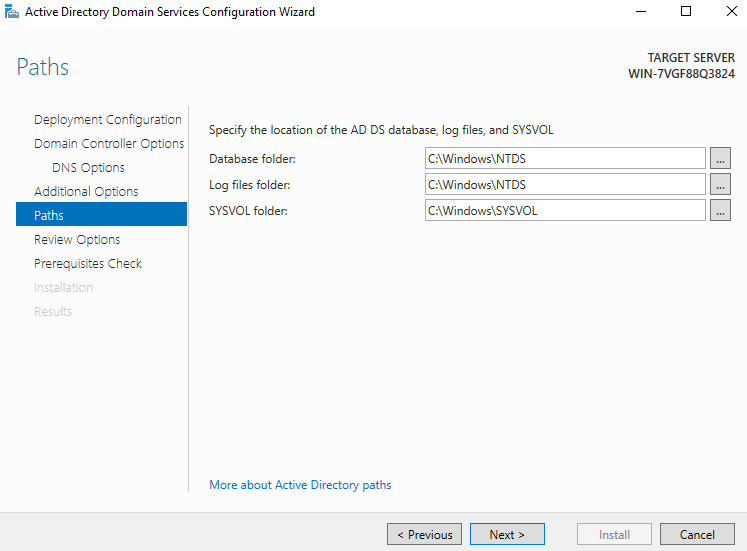
6) You can also directly use the path by default and go to the next step
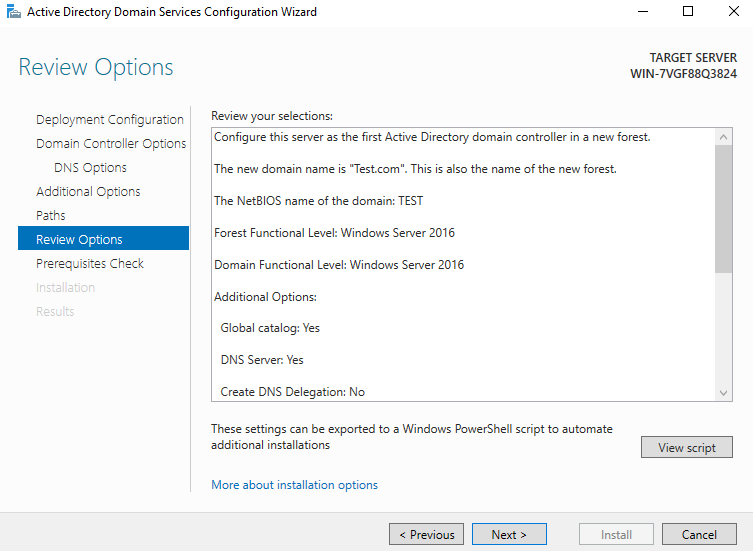
7) View options. Go to the next step directly. From the view script, you can see that DNS will be automatically installed in the script
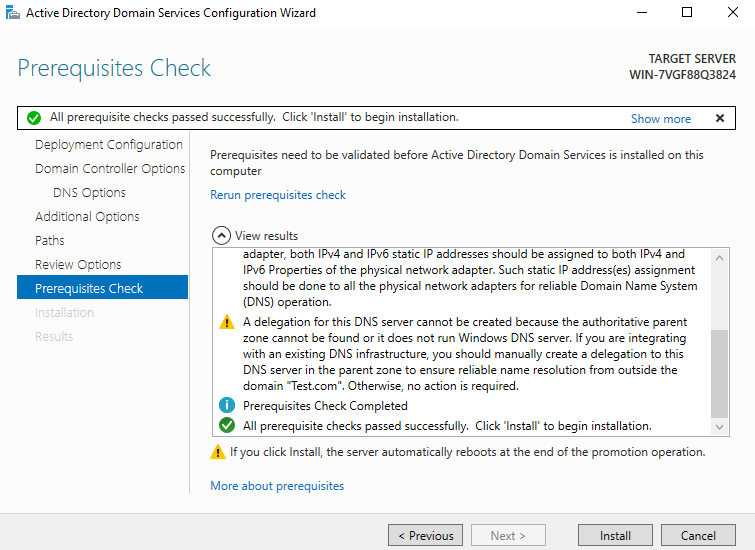
8) If the prerequisites are checked correctly, the installation can be carried out directly in the next step. If an error occurs in this step, you can fix them according to the error report. Generally, it is the result of conflicts of other services or didn’t set an admin password
9) Waiting to installation
- The installation takes a few minutes. After the configuration is completed, the host will restart automatically, and after the automatic startup, it will use a period of time to update the configuration.
(3) Add a domain server to the local server you want to manage
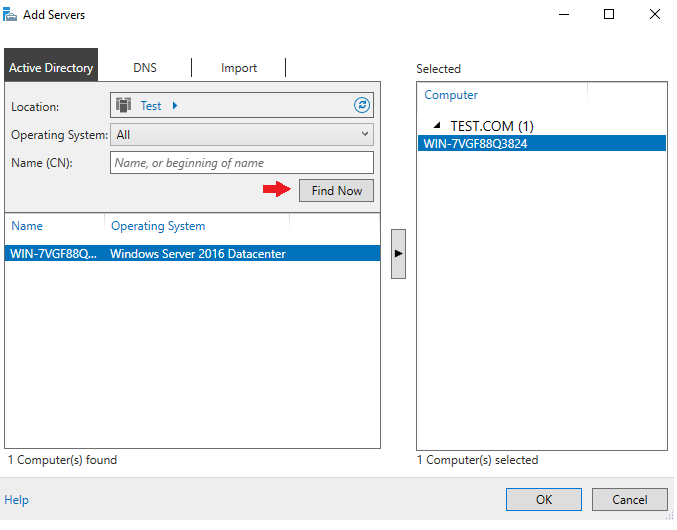
1) Select ‘Add other servers to manage’

2) After clicking ‘Find Now’, the server will be found. Double click to add
3) From the local server, you can see that the domain has become what you just set
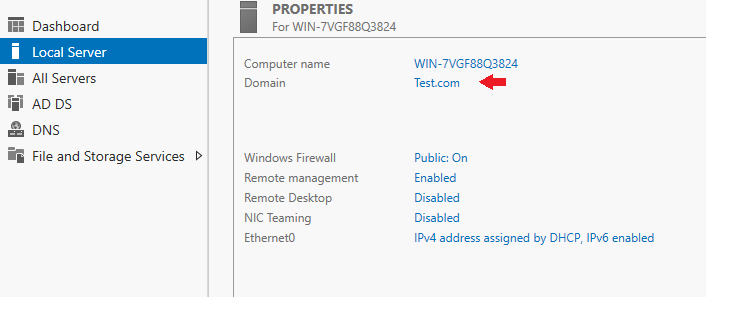
So far, the domain configuration is successful. Next, install and configure the CA
2、 Certificate Authority
(1) Installation
- The steps are similar to installing domain services, so here are only screenshots and some necessary instructions. If there is no modification, the instructions will not be written
Select ‘Add roles and features’

Select ‘Active Directory Certificate Services’

Select ‘Add’. You do not need to select in the previous step. Go to the next step directly

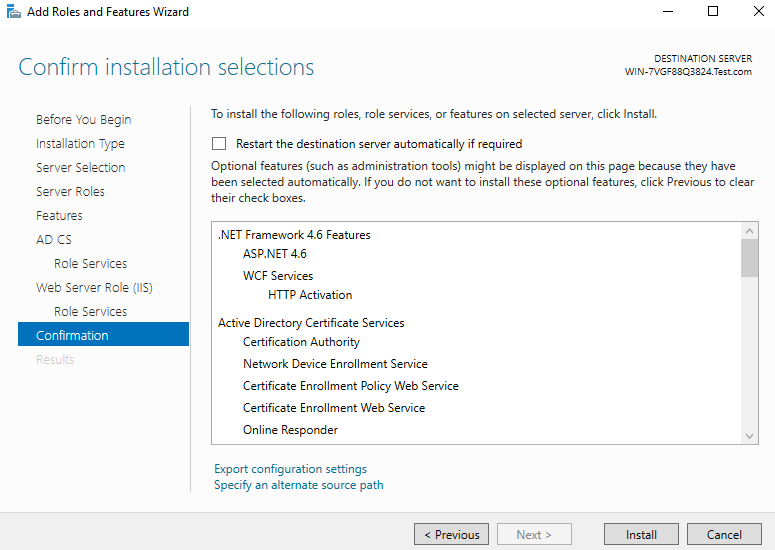
Click ‘Next’ until the ‘Confirmation’ page shows up, click ‘install’
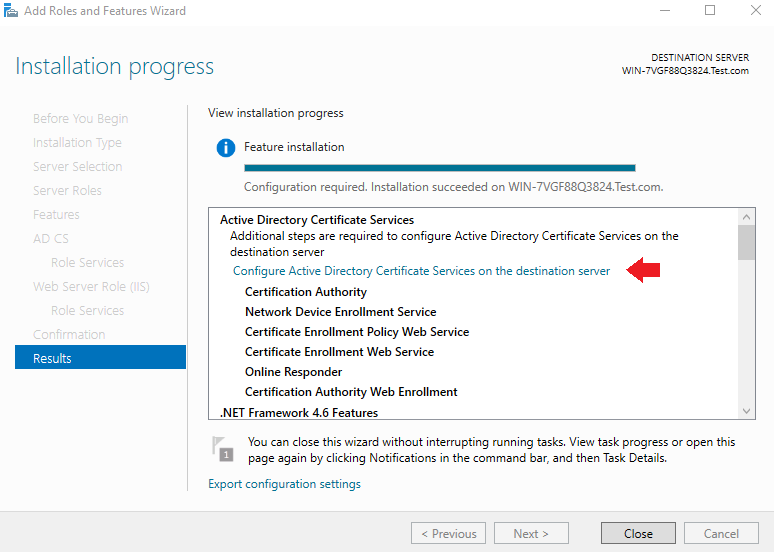
Installation succeed
(2) Configuration
Directly click ‘Configure Active Directory Certificate Services on the destination server’ on the installation completion interface.
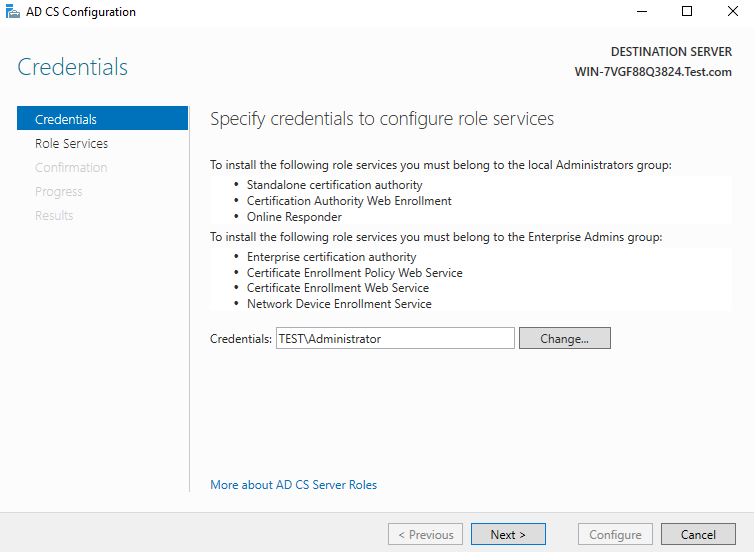
1) Credentials will be added automatically. Click ‘Next’ directly. Please notice that you must login as this domain ‘s admin or enter the domain admin in the ‘Credentials’ blank, otherwise you may not be able to install some features in the next steps
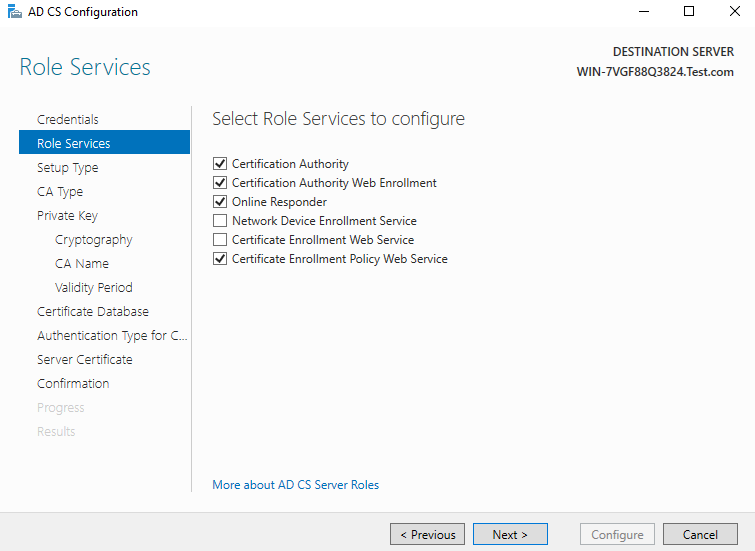
2) The role service will be installed just like this
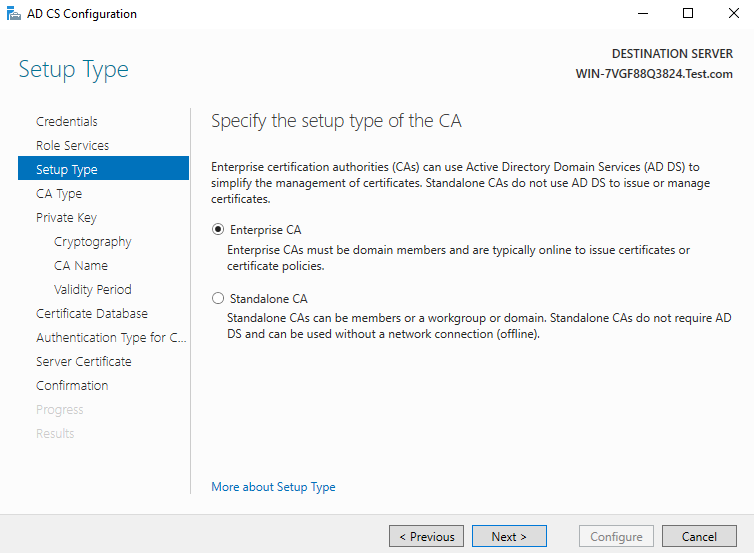
3) The specified type must be ‘Enterprise CA’. If this option is gray and not optional, you need to see whether the domain configuration is correct(Normally this is because the current user is not a domain administrator, please see previous two steps)
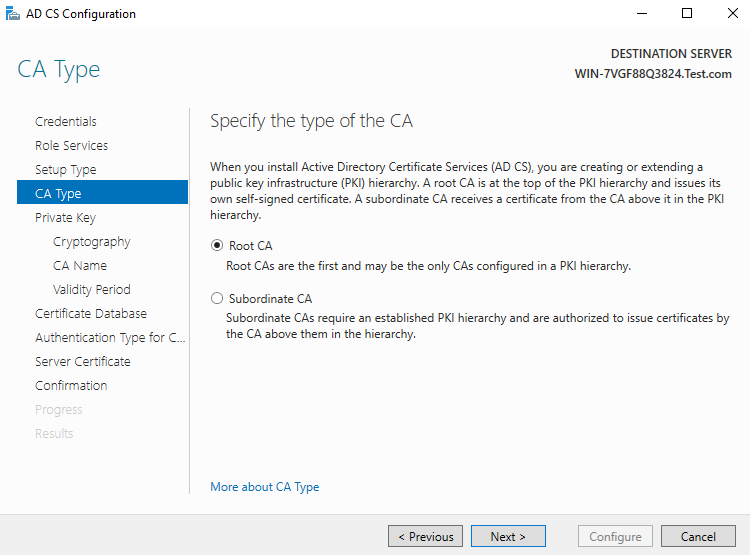
4) Select the default CA type. The default is ‘Root CA’. go to the next step
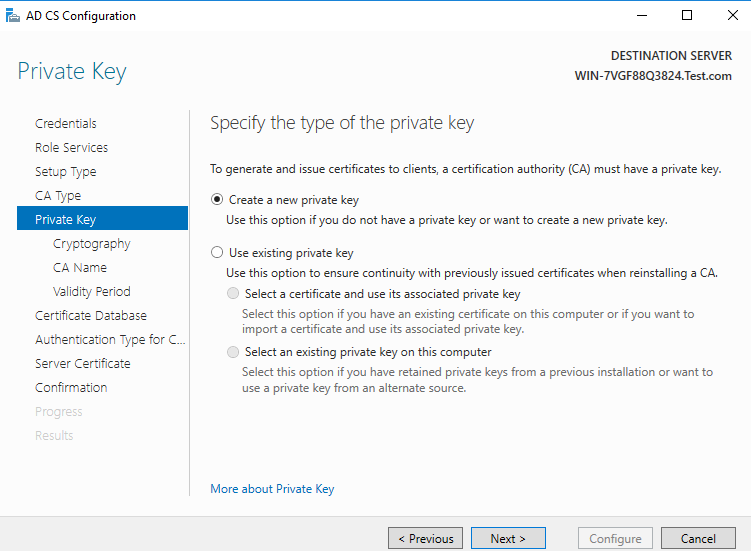
5) Select the default private key type, create a new private key, and go to the next step directly
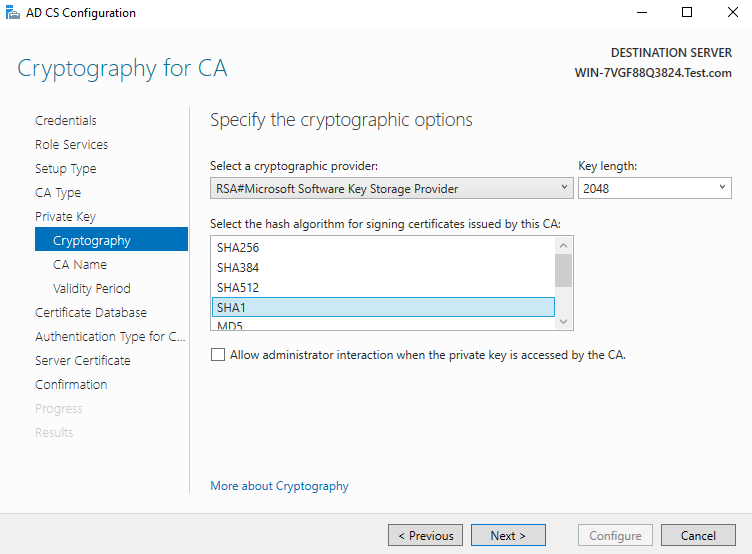
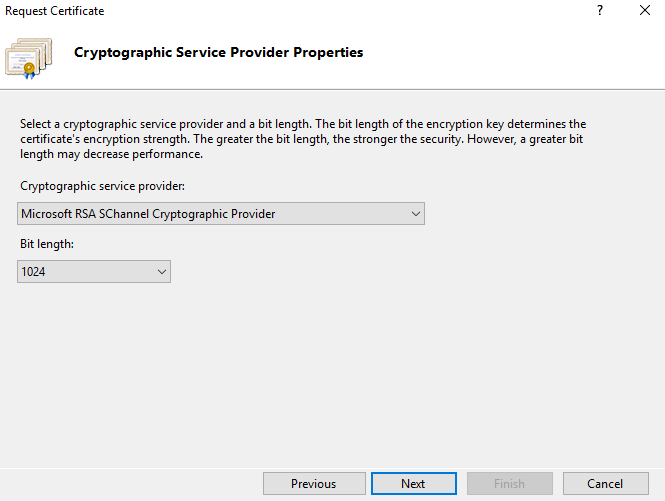
6) Select the encryption algorithm. The default is SHA1 encryption algorithm. The current calculation 2048 is the key length(Please notice the support list of your security key)
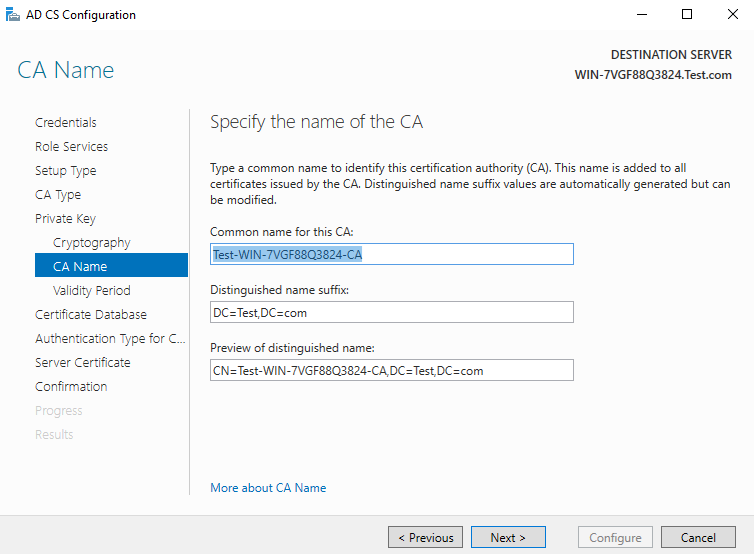
7) The CA host name will be generated directly by default without modifying
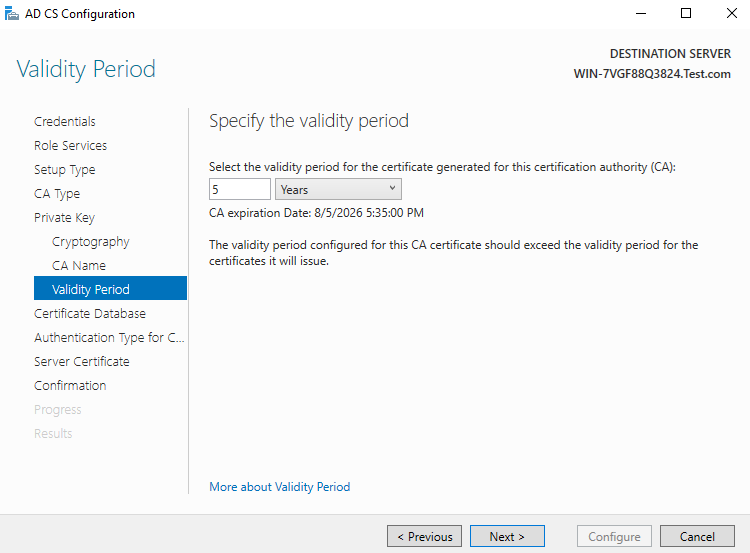
8) Select the validity period, which is 5 years by default
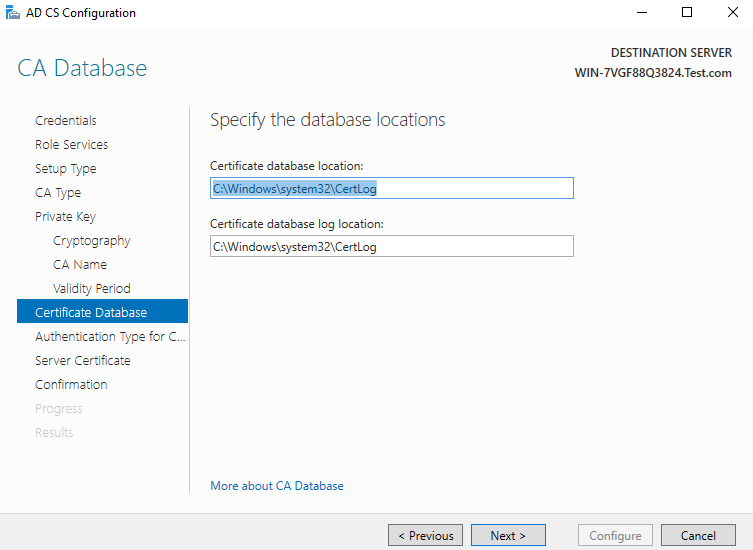
9) The database location will also be generated automatically. Next
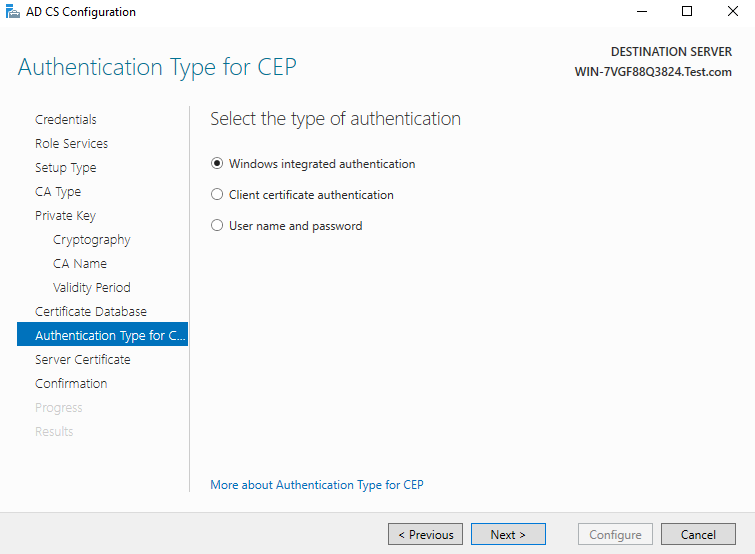
10) CEP authentication type, go to next step by default
- CEP authentication is a renewal setting based on certificate key. It does not need to be considered here. You can use the integrated authentication selected by default.
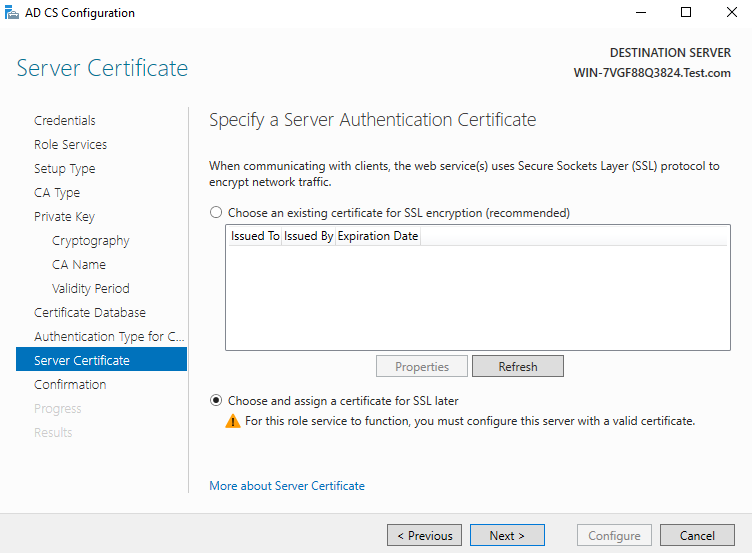
11) Since the existing certificate used for SSL encryption is not set up at present, choose to assign it to SSL later
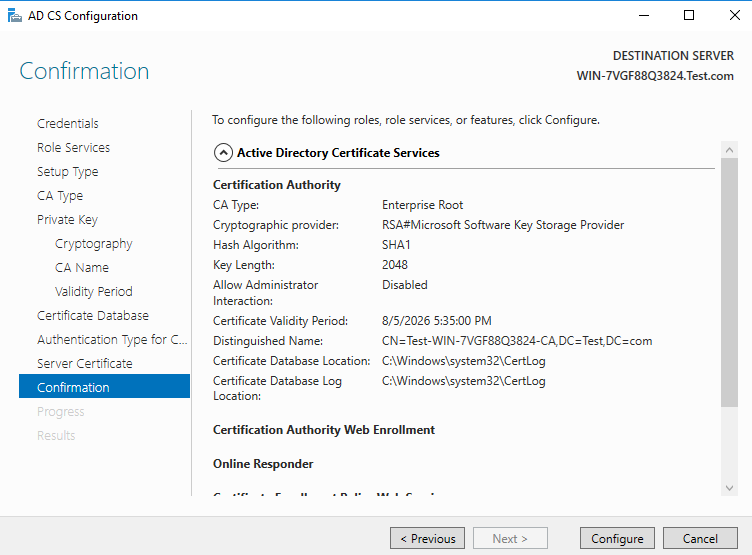
12) Confirm and start configuration
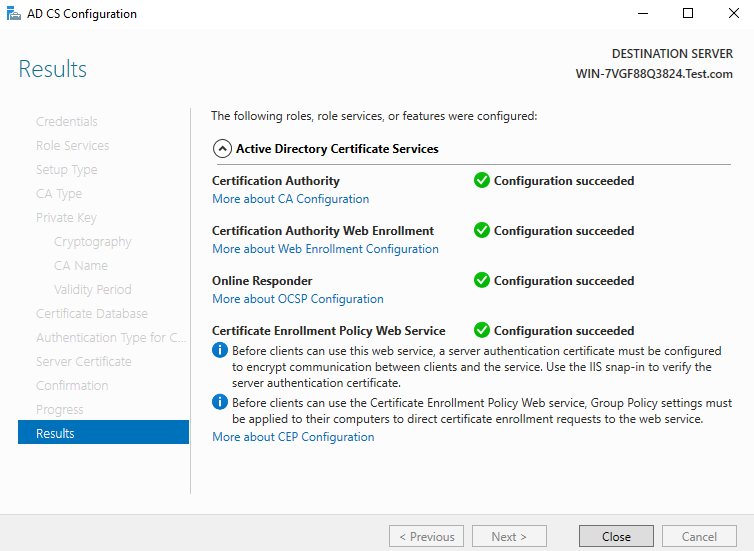
13) Configuration succeed
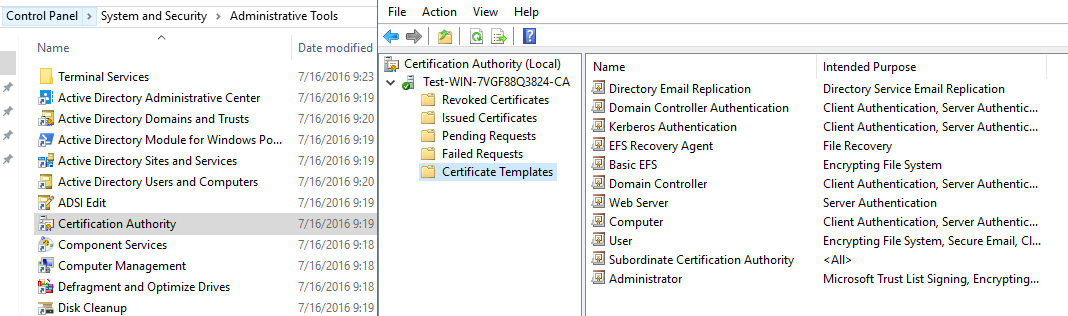
- At this point, the CA installation and configuration are done. But Since the CA is not available for SSL connection as mentioned at earlier steps, now you need to configure SSL connection in order to access full functions
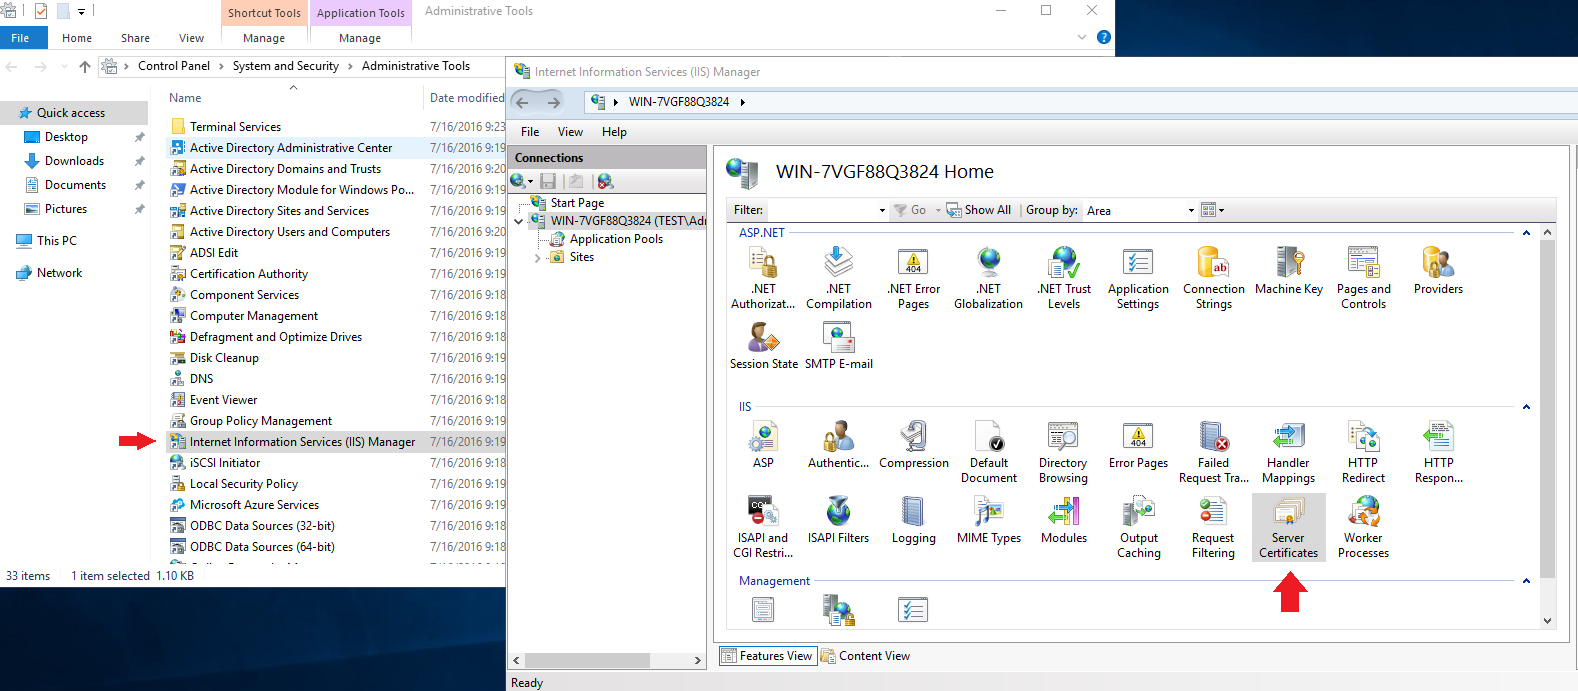
- At Control Panel, find System and Security, Administrator Tools, open the Certification Authority. You can see that there is a certificate template in it, indicating that the configuration is successful.
3、 Request for a certificate for SSL configuration
(1) Add signing certificate in IIS
1) Open the IIS server in the toolbar
2) Select ‘Server Certificates’
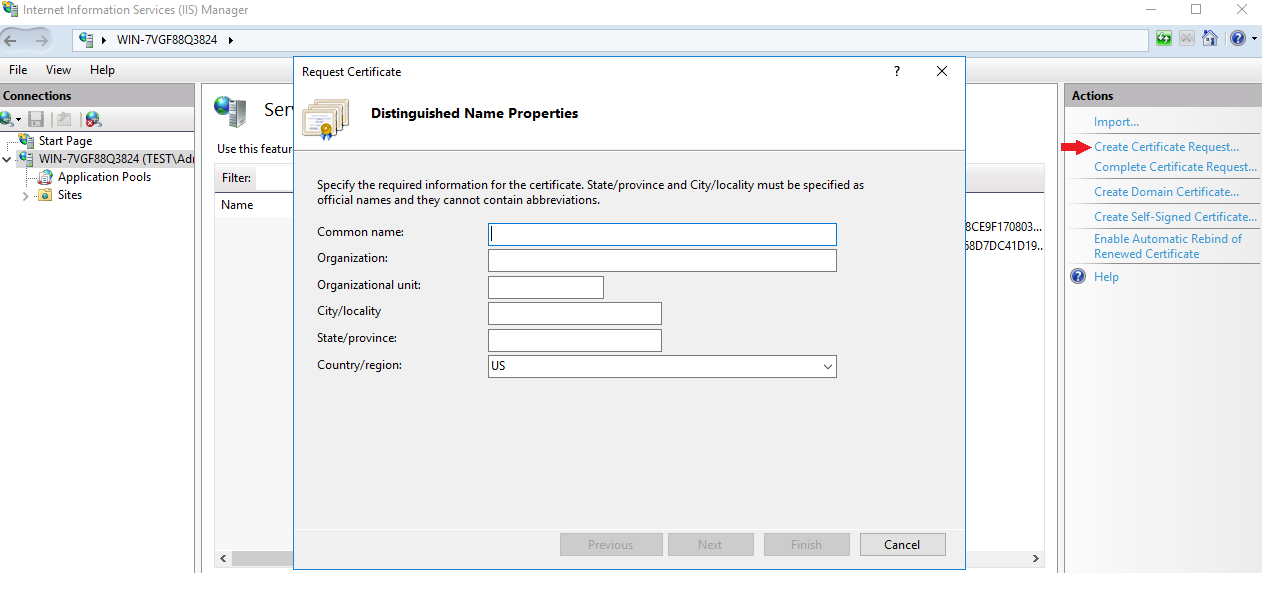
3) Select ‘Create Certificates Request…’, and fill in the following information by your will
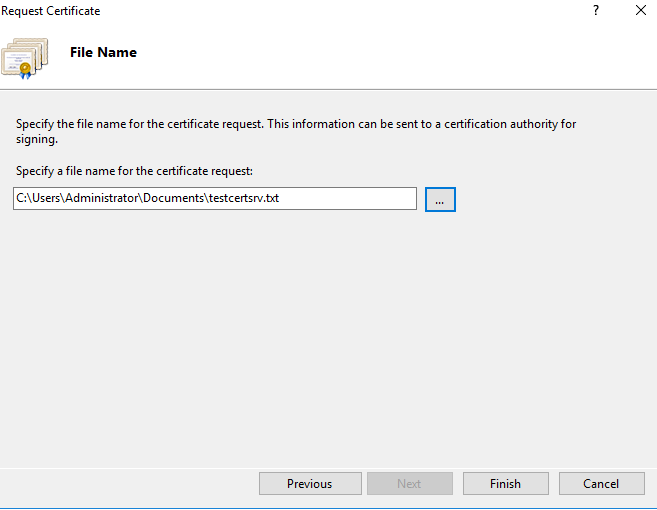
4) Click ‘Next’, directly select a path and create a file. Just enter the file name without writing content
5) Open the text document and copy its contents, as shown in the following figure:

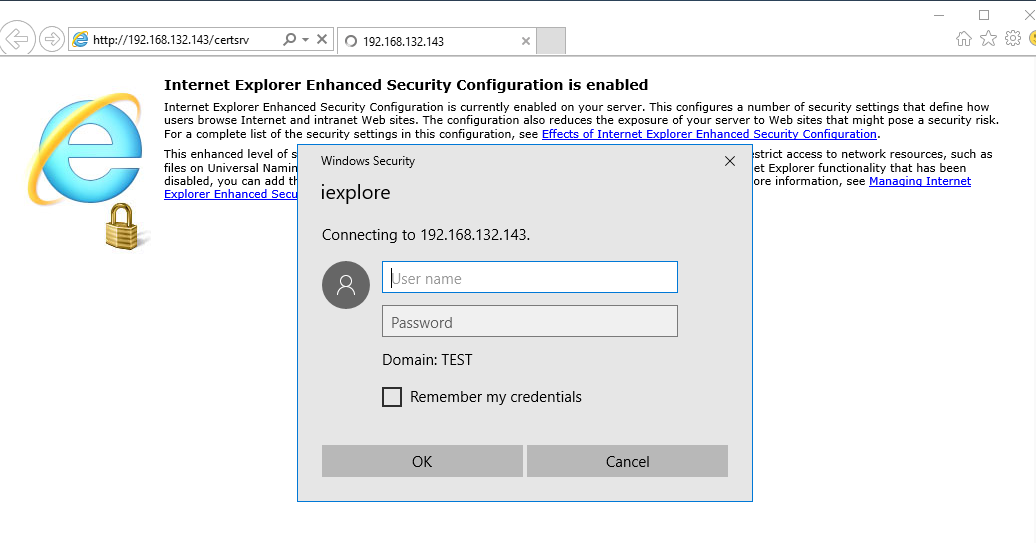
6) After copying, find the IP address of this machine at shell, open a browser and enter “http://[your IP address]/certsrv”, and then input your domain user name and password
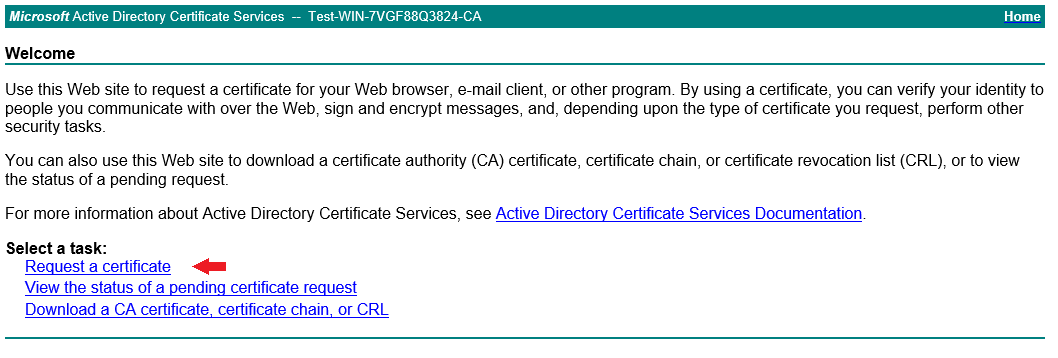
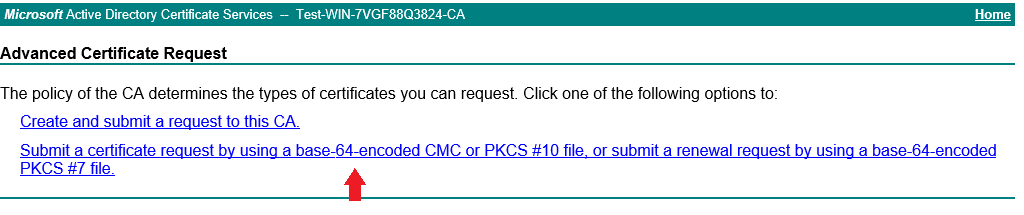
7) Select ‘Request a certificate’, then select ‘advanced certificate request’, and select ‘Base64 encoded’ request

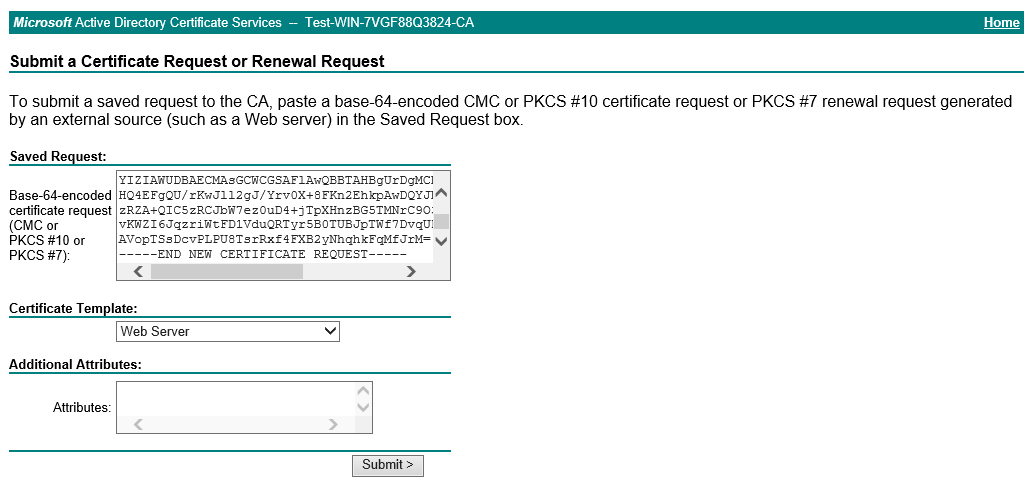
8) Paste all the contents copied in the previous document into the text box, select “Web Server” for the certificate template, and submit the application
9) The following page appears, click ‘Download certificate’ to download the certificate
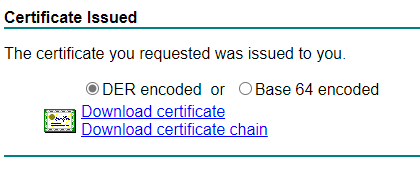
10) Complete certificate application
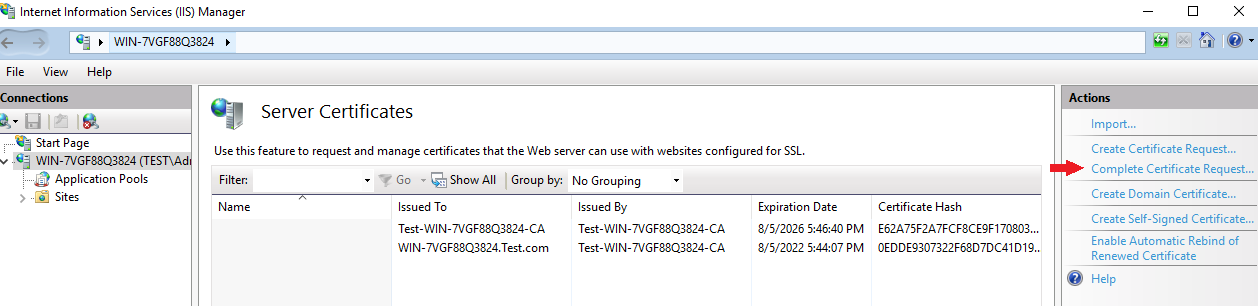
First download the certificate locally, and then open IIS manager, open Server Certificates page, select ‘Complete Certificate Request…’
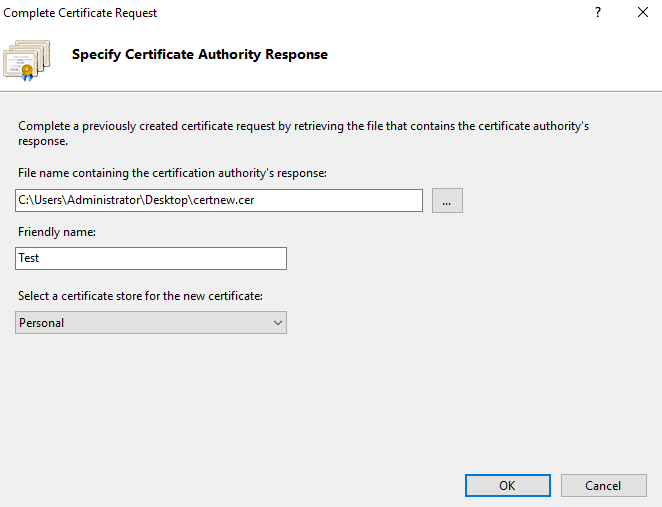
The following form will appear, select the certificate file you just download, name it and select ‘Personal’ as store type
At this point, you can see that there is an additional site in the server certificate, as shown in the following figure:
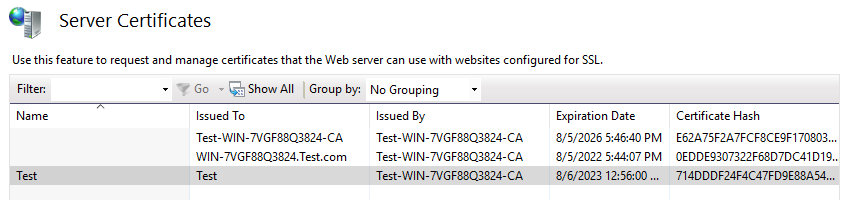
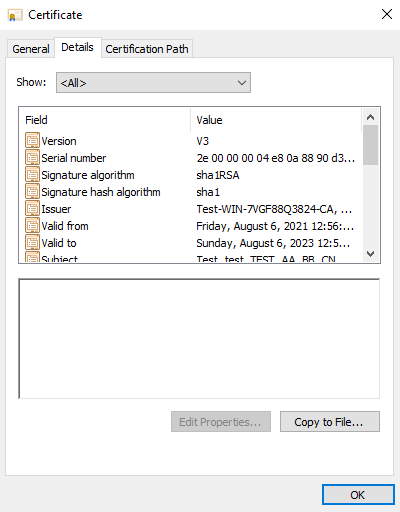
View the certificate information as shown in the figure below
4、 Configure HTTPS for CA
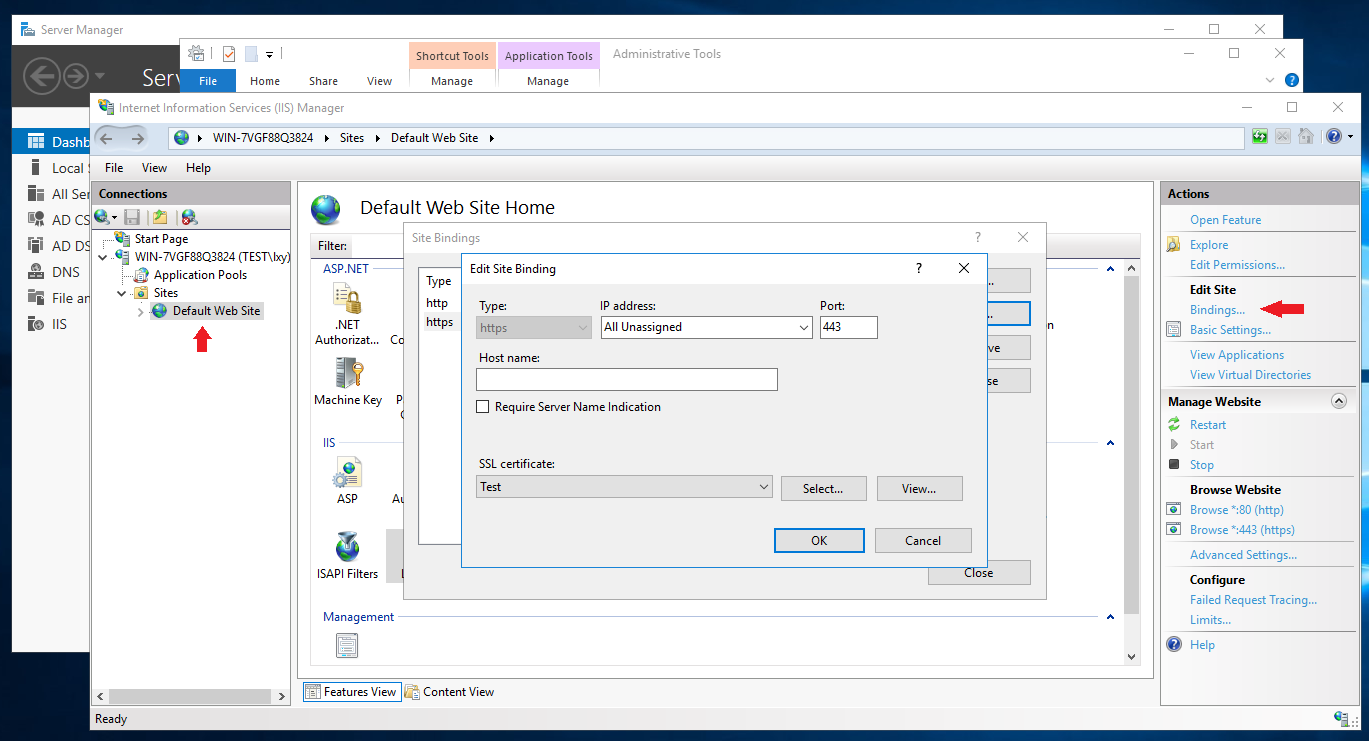
In IIS, set the SSL certificate as the newly added certificate by setting HTTPS. Select ‘Default Web Site’, click ‘Bindings…’, double click ‘https’, configure as below, select the certificate you just download at the previous step as SSL certificate, click OK.
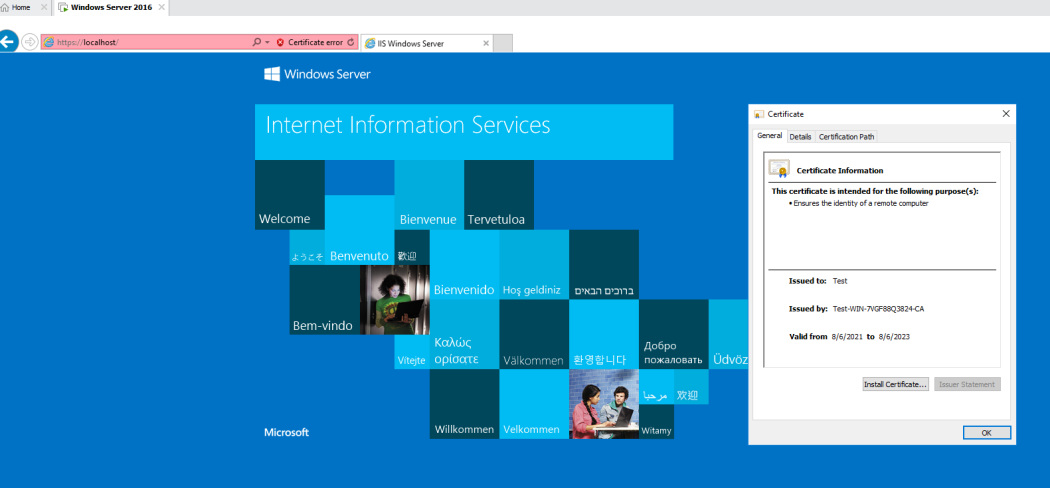
View with browser, you can see that the certificate information is indeed the certificate just added
- If you don’t want to the error information, you can import the certificate into the certificate management organization.
So far, all settings are successful!!!