The guidance is only for reference. Users should configure their servers and clients according to their organisation’s security requirements!
In some situation where the user certificates cannot be generated on the key, they can be generated on a Windows PC as a .pfx file and imported to a key. This document is about how to manually import certificates to FEITIAN FIDO keys to work as a Windows logon smart card. This process mainly contains two parts:
-
Step 1: Enable a private key exportable smart card login certificate template
-
Step 2: Generate and import user certificates as a .pfx file
Step1. Enable a Private Key exportable Smart Card Login Template
- In order to create a PFX file, the certificate template must be set as private key exportable. This section provides instructions on setting up a CA to allow the private key to be to exported for the creation of PFX files with the Enroll on Behalf functionality.
1.1 Create a private key exportable smart card certificate template
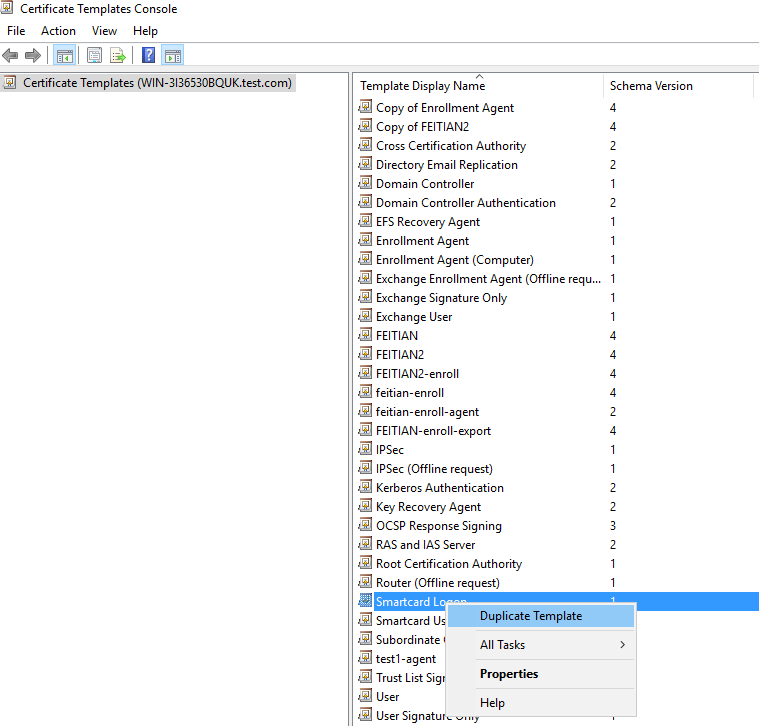
(1) Right-click the Windows Start button and select Run. Type certtmpl.msc and press Enter. Click Certificate Templates, locate and right-click Smartcard Logon, and select Duplicate Template.
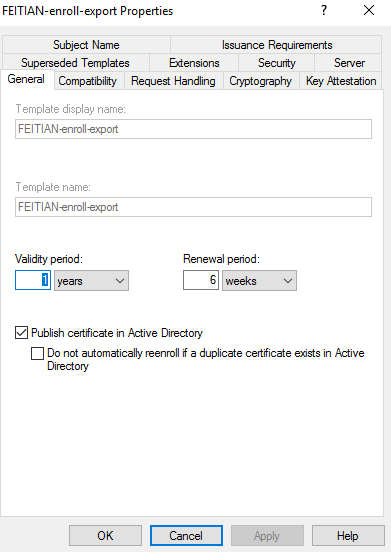
(2) In General tab, Ensure the option Publish certificate in Active Directory is selected.
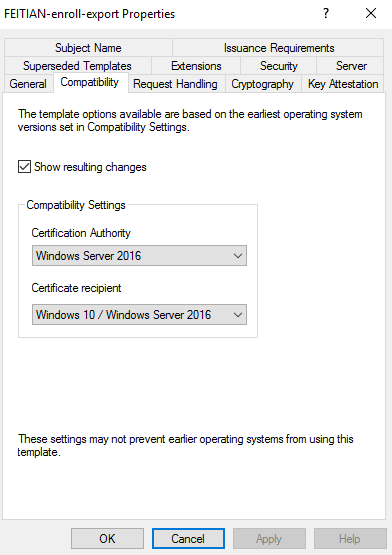
(3) In Compatibility tab, select your CA ’s Windows Server version and oldest domain user ‘s Windows version.
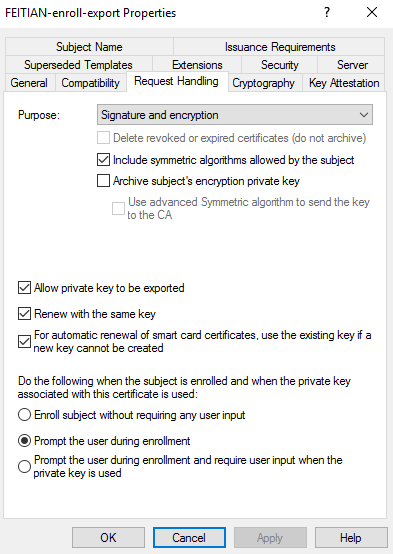
(4) In Request Handling tab, Ensure the following options are selected:
-
- For Purpose, select Signature and encryption.
- Select Include symmetric algorithms allowed by the subject
- Select Renew with the same key
- Select Allow Private Key to be exported
- Select For automatic renewal of smart card certificates, use the existing key if a new key cannot be created
- SelectPrompt the user during enrollment
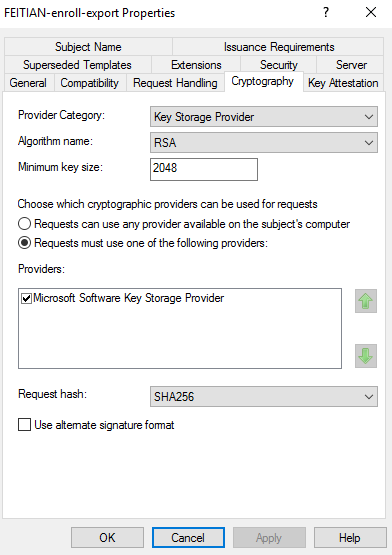
(5) In Cryptography tab, Ensure the following options are set:
-
- For Provider category, select Key Storage Provider , For Algorithm name, select either RSA or ECDH 256, from the list displayed.
- For Minimum key size, if you selected RSA in the previous step, enter 2048. If you selected ECDH_P256 in the previous step, this field is automatically populated.
- Select the option for Requests must use one of the following providers:.
- Under Providers, select Microsoft Software Key Storage Provider.
- Click the arrow for Request hash and select SHA256 from the list displayed.
-
- Note that if an ECDH algorithm is selected, the client Windows machines need to have Elliptic Curve Cryptography (ECC) Certificate Login support added using Group Policy or by editing the registry. Please see Other Configurations About CA for instructions.
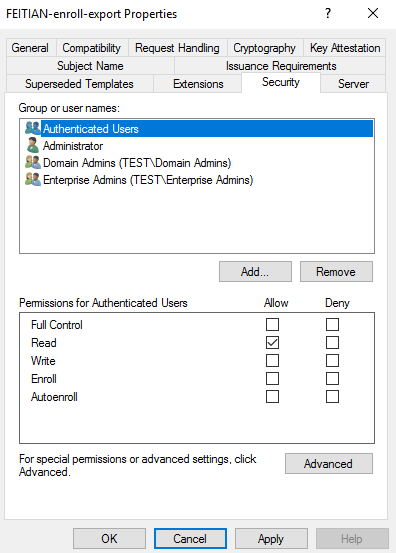
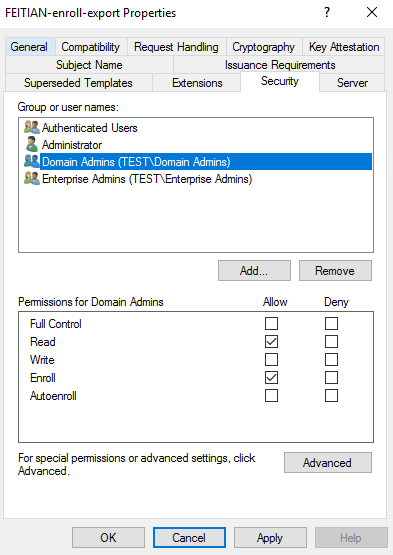
(6) In Security tab, For Group or user names: Confirm Authenticated Users is listed. For Permissions for Authenticated Users, be sure at least the option for Read is checked. For any administrator, group, or user who needs to create certificates for others, be sure at least the option for Read and Enroll is checked.
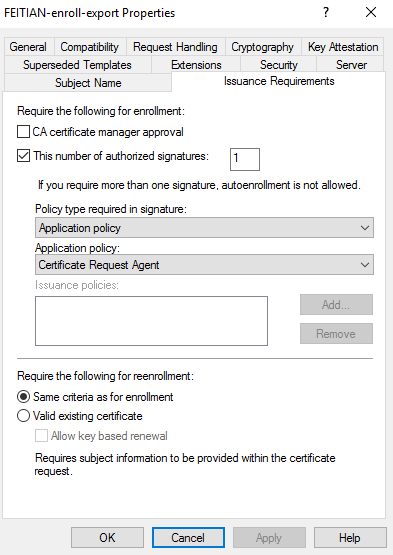
(7) In Issuance Requirements tab, Be sure the option is selected for This number of authorized signatures, and enter 1. For Policy type required in signature, select Application policy. For Application policy, select Certificate Request Agent.
(8) Click OK to close the template properties window. Close the Certificate Templates MMC Snap-in.
1.2 Add the template to the Certification Authority
(1) Right-click the Windows Start button and select Run, type certsrv.msc and press Enter.
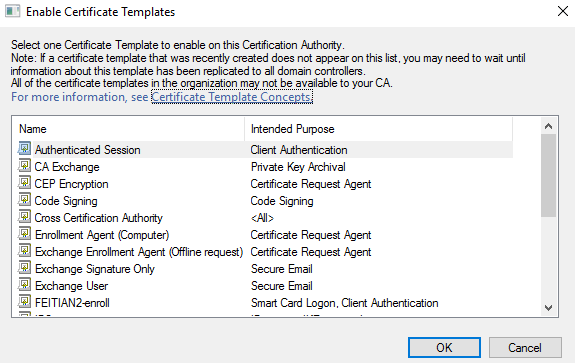
(2) Click Certification Authority, double-click your server, right-click Certificate Templates, select New, and then select Certificate Template to Issue. Locate and select the private key exportable template you just created, and then click OK.

Step 2. Generating and importing user certificates as a .pfx file
- In environments where the user certificates cannot be generated on the FEITIAN Key, they can be generated on a Windows PC as a .pfx file and imported to a FEITIAN Key for use.
- Before enrolling the user certificates, make sure you have issued a enrollment agent certificate. Please see Enroll Windows Smart Card Logon Certificates On Behalf of Other Users – Step 1 for details.
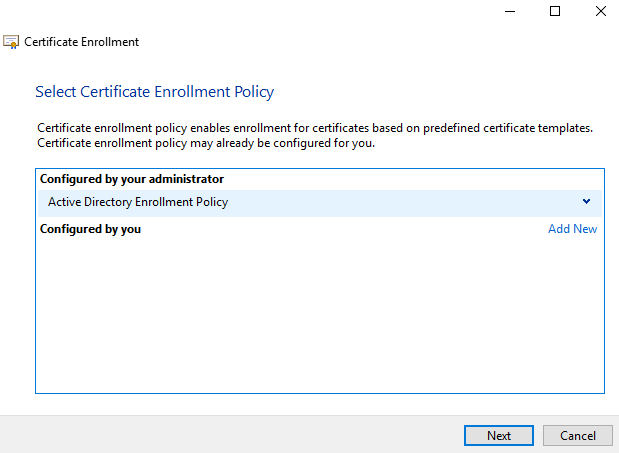
2.1 Enroll the private key exportable certificate on behalf of a user
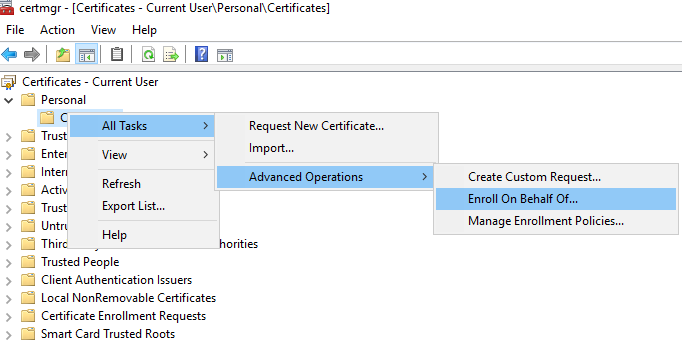
(1) Run certmgr.msc, at Certificates – Current User, find Personal, right-click Certificates, Select All tasks – Advanced Options – Enroll On Behalf Of…
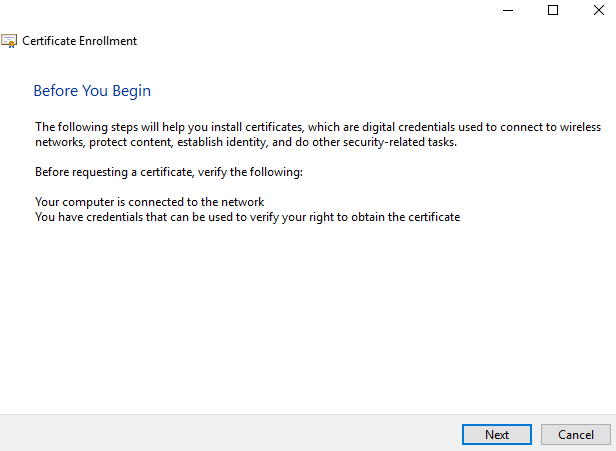
(2) Click Next.
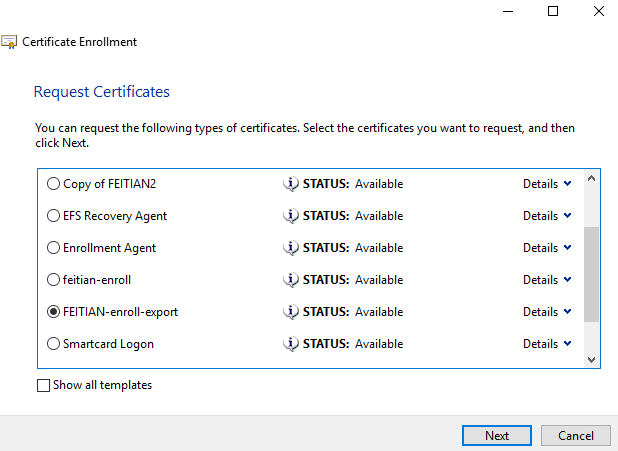
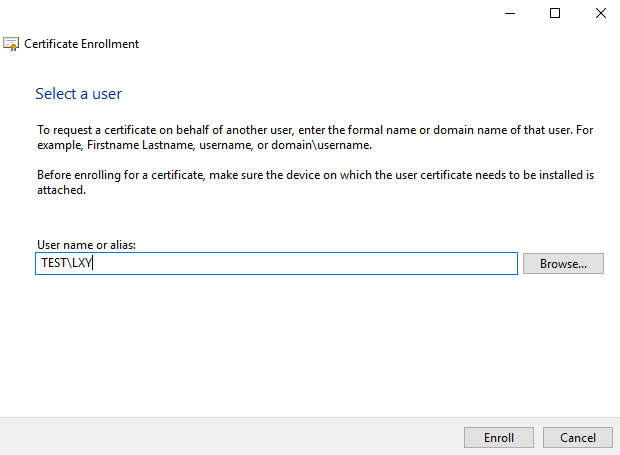
(3) Select the enrollment agent certificate, select the type of certificate that you want to enroll for, enter the account name and click Enroll.

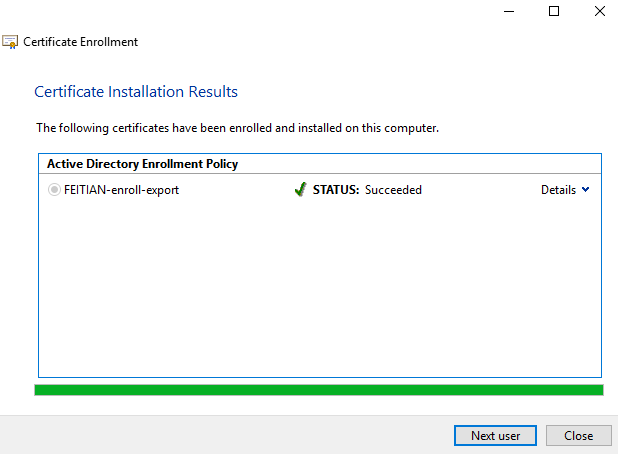
(4) Allow the app to access your private key. After the Certificate Enrollment Wizard has successfully finished, click Close or enroll for other users
2.2 Exporting a certificate as a PFX file
(1) Stay in the certmgr.msc window, right click the certificate just issued, select All Tasks, and then choose Export.

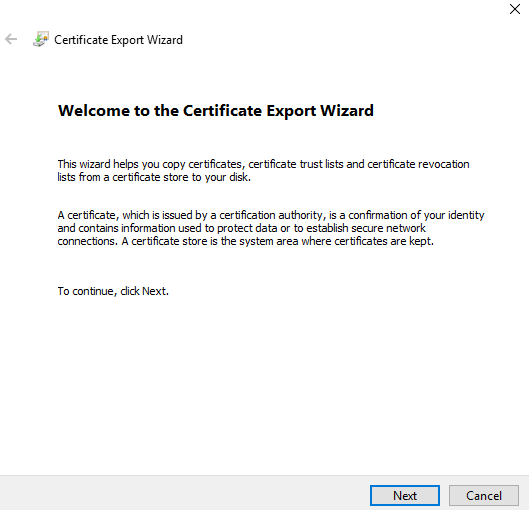
(2) The Welcome to the Certificate Wizard dialog box appears. Choose Next to continue.
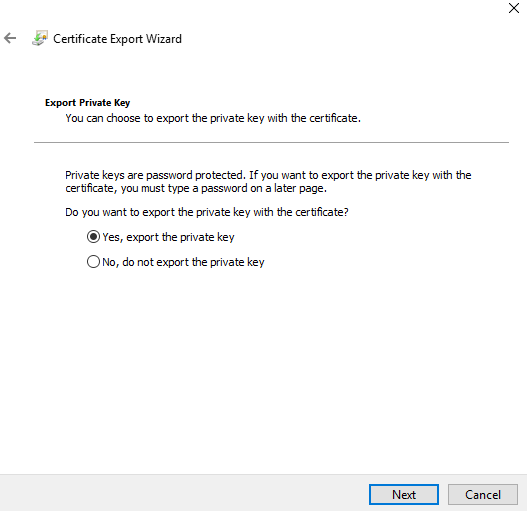
(3) On the Export Private Key page, select Yes, export the private key. Choose Next.
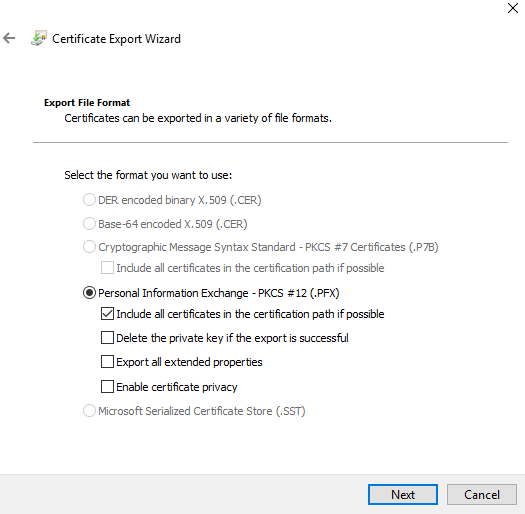
(4) On the Export File Format page, make sure that you select Personal Information Exchange – PKCS #12(.PFX). Other options could be left as default.
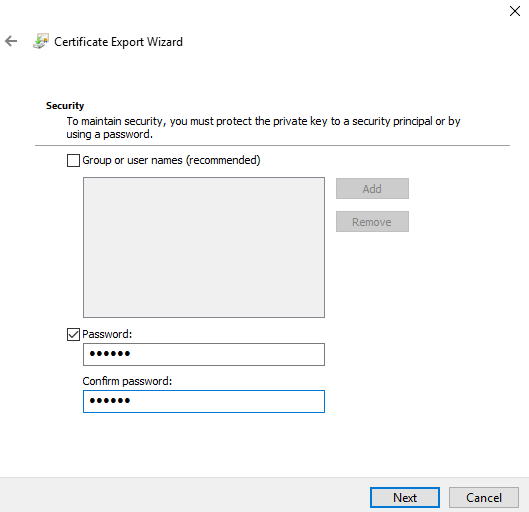
(5) Set a password, and then choose Next.
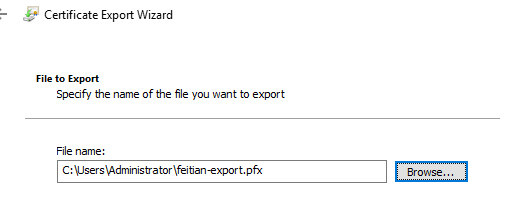
(6) On the File to Export page, type the path and filename of the .pfx file. Choose Next.
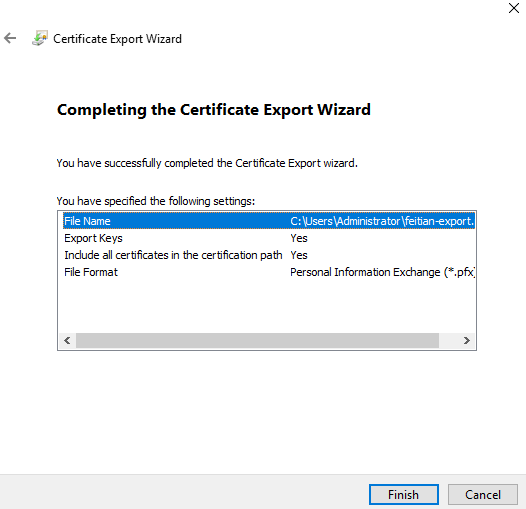
(7) Choose Finish. On the Certificate Export Wizard page, choose OK to confirm that the export was successful.
2.3 Importing a .pfx file using the FT_SK_Manager
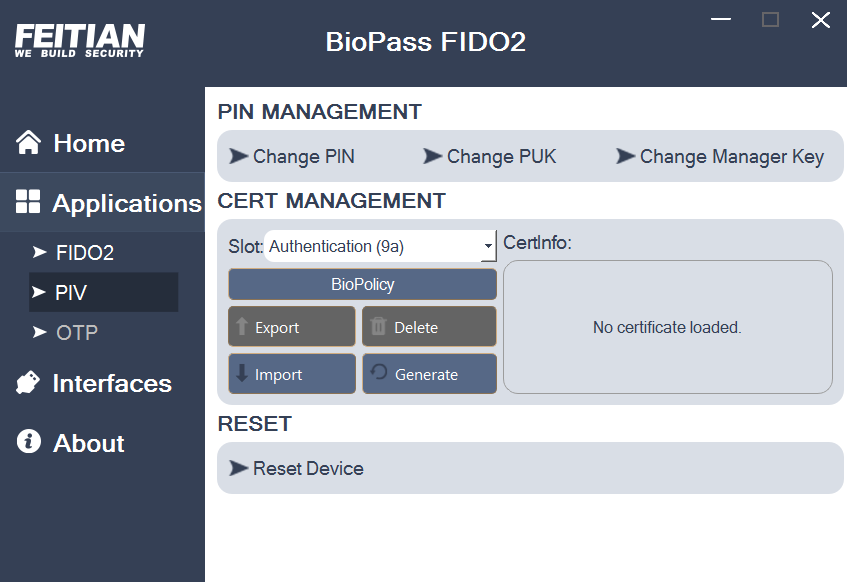
(1) Insert a FEITIAN key with PIV, open FT_SK_Manager and click Applications, Select PIV, Select the Slot you wish to import the certificate to in this case it’s Authentication (9a) , click Import.
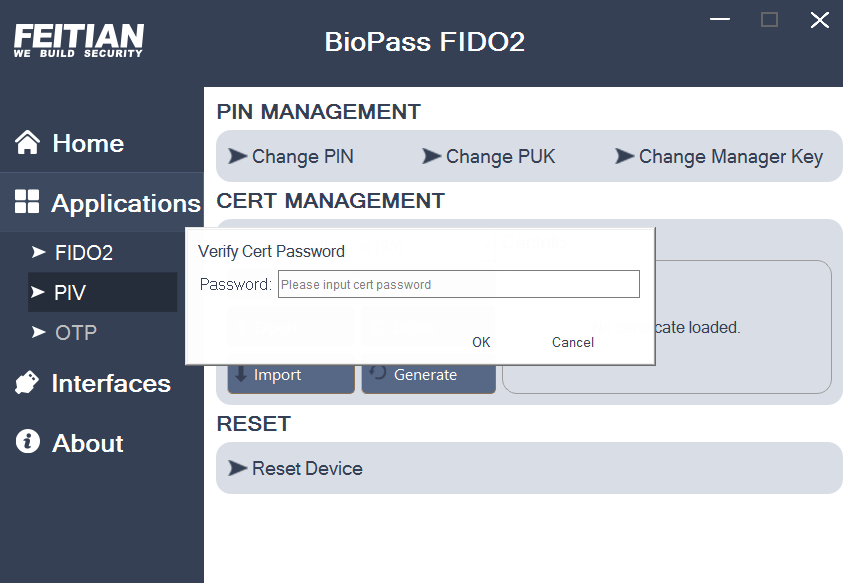
(2) Browse to the .pfx file you want to import, and click Open. You may need to enter your PIV pin and Management key. And then, enter the password that was set for the certificate and click OK.
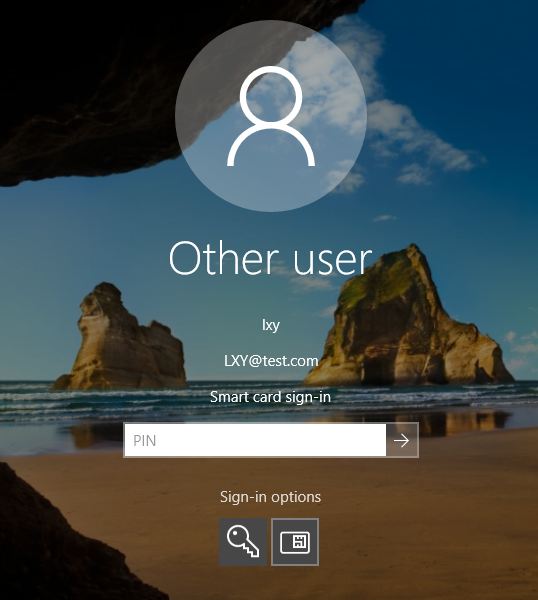
(3) Now the configure is all set, you can use this device as a smart card to logon to Windows.