Chapter 1 Overview
- Nowadays, Internet connection security has become an increasingly important issue, against this, our FETTIAN FIDO products could help establish a secure connection channel by applying FIDO functions through SSH(Secure Shell), which is a common connection protocol between client and server. And now OpenSSH(version must be later than 8.2) has equipped with FIDO functions. This document mainly talks about how to apply our FIDO keys to safely operating remote accounts through SSH connection. In this document, we are using two examples to illustrate how to use our products to apply SSH connection:
- Using Github as a remote test website and Git Bash as a command line tool. They just support FIDO2 Security keys for SSH Git operation recently, please see link: Security keys are now supported for SSH Git operations | The GitHub Blog.
- Connecting remote Linux system using Git bash.
1.1 Prepare
- FEITIAN FIDO keys (in this document, using BioPass K27) with PIN already set.
- A Github account with a test repository.
- Git bash equipped with OpenSSH later than 8.4p1 and OpenSSL later than 1.1.1h.
- Linux subsystem or virtual machine for the second example.
Chapter 2. Connecting Github
- Our FIDO2 security key can be used in SSH connection following FIDO2 protocol to remotely operate your account, using Github connecting and Git repository as an example.
2.1 Set FIDO key ‘s PIN
- Please skip to next step if you have already done this.
- Connect your FIDO key to PC or other machines, use FT_SK Manager/FT BioPass Mnanger(for fingerprint keys)/fingerprint manager from system to set a PIN.
- Please see link: FT_SK manager user manual.
2.2 Generate key-pair
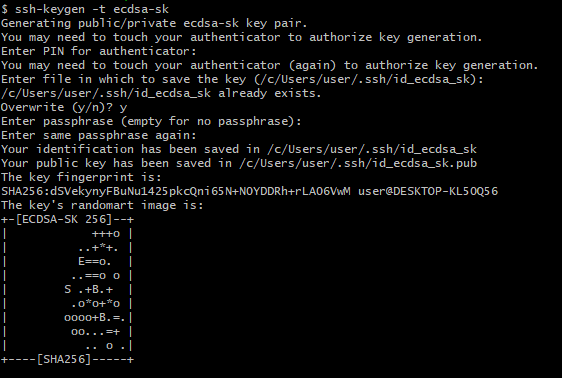
- Insert your key, open Git bash commandline, enter:
- ssh-keygen -t ecdsa-sk -C <your Github account email address>

- Notice that our key supports ecdsa-sk algorithm only, please do not choose other types.
- You may need to touch your key.
![]()
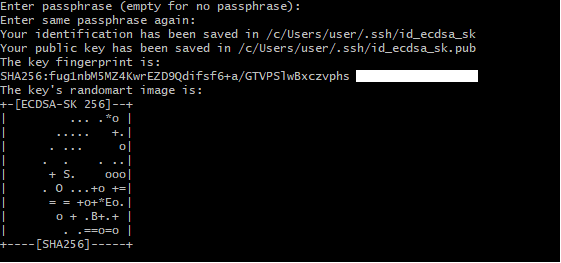
- Enter the PIN for the key you have set. Then touch the key again.
![]()
- Enter the path to store key pair at, leave it empty to use the default path.If you already have a file with the same name and type, you will be ask whether to override.

- This command will create a public-private key pair and store in your machine at t
- he path, but the secret bits are actually generated and stored in your security The private key file is more of a reference to security device. Which means others can not use this private key file without your security key device. Please protect physical accessability to your security key.
- Enter the passphrase for encryption and decryption if you need, enter again. Then you are done!
2.3 Copy the public key to Github website
- Use text edit applications to open the public key file in your PC at the path you set.
![]()
- Copy the content.

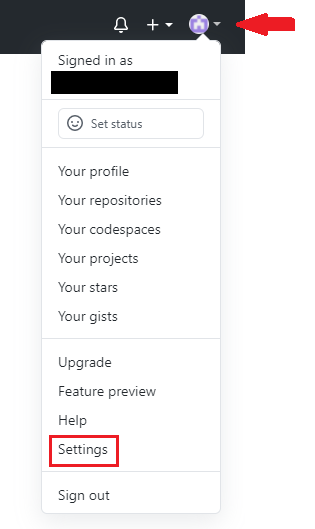
- Open GitHub official website, click account icon at the top right corner, and then click ‘Settings’.
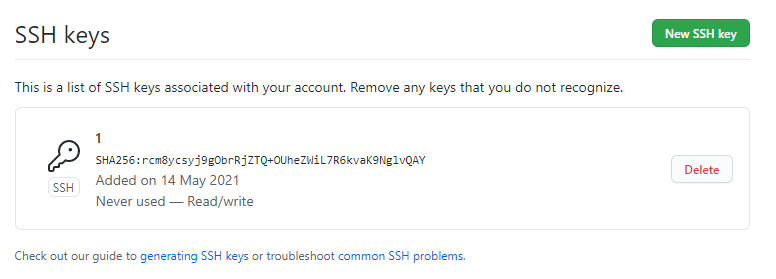
- At account setting page, click ‘SSH and GPG keys’ to open SSH and GPG key configure page, and then click ‘New SSH key’.
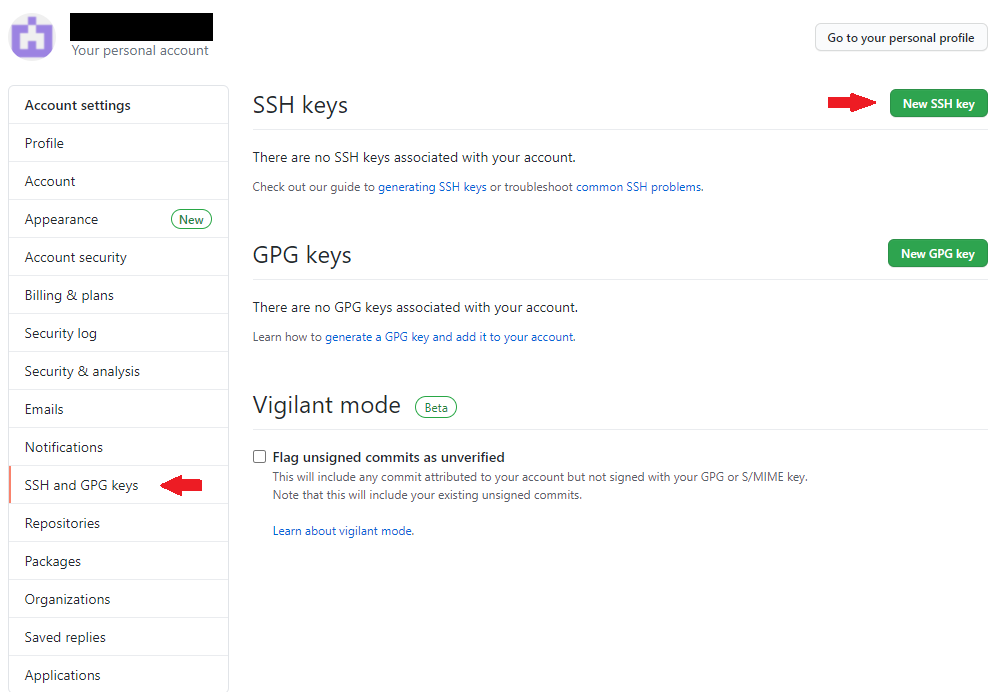
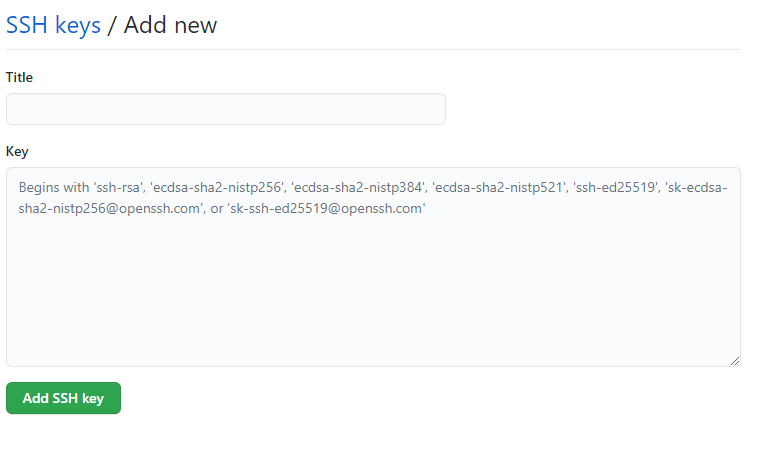
- Paste your public key file content in to the ‘Key’ box, name a title and then click ‘Add SSH Key’. Then you are done!
- You can see all your SSH key here, you can add another one or delete one.
2.4 Connect Github at Git Bash
- Make sure your security key is inserted.
- Open Git bash, first test SSH connecting by entering:
- ssh -T git@github.com

- You may need to touch your key to confirm user presence.
- When you see this message, the connection is success.
![]()
- You can now do git operation to manage your Github projects, enter:
git clone git@github.com:github/secure_headers.git
- This will copy user Github’s project to local machine, the default path is same with PC user, but you can also add your preferred path and name. Enter:
git clone git@github.com:github/secure_headers.git <path/name>
- You may need to touch your key.

- Succeed to clone remote project to local.

- Now you can manage Git project at local machine. You can apply this safe connection to any remote operation such as pull, push and fetch.

Chapter 3. Connecting Linux System
- There is another example of SSH: Connecting Linux subsystem(or Linux virtual machine).
- Make sure both your client and server are running Openssh later than v8.2 and set your pin and fingerprints of your FIDO devices.
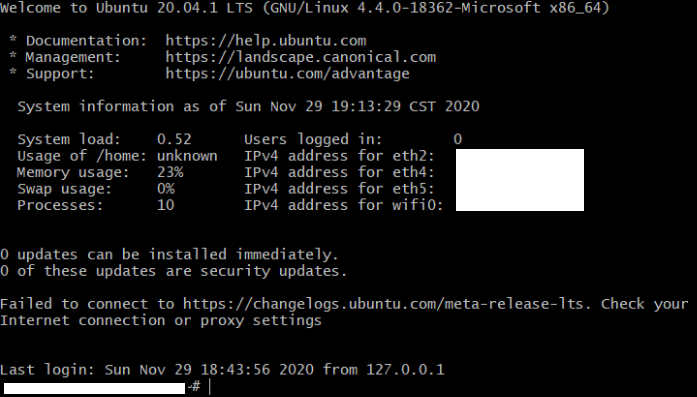
- Use Git bash in Windows 10 as a client and Ubuntu 20.04 LTS as a server in this case.
3.1 Generate public and private key pair
- Plug in your FIDO devices and enter:
ssh-keygen -t ecdsa-sk
- The next stops are same as Chapter 1:
- Enter the PIN for your devices.
- Touch your FIDO device.
- Enter the file path to save the keys at(The default path is shown below).
- Enter the passphrase twice (not necessary) and you’re done!
3.2 Put public key pair in to the target server
- Open command line in target server.
- Put the public key(id_ecdsa_sk.pub) in server(For Linux the path is ~/.ssh) and add it to the file authorized_keys, enter the path ~/.ssh and input:
cat id_ecdsa_sk.pub >> authorized_keys
- Please give authority 600 to .ssh and 644 to authorized_keysusing ‘Chmod’
3.3 Prepare the server configuration
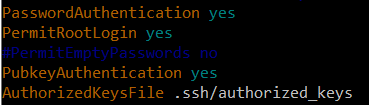
- Check ~/.ssh/sshd_config, make sure the port number dose not conflict with other progress.
![]()
- Also, make sure, public key authentication is “yes”, check the path of authorized_keys, if your client user is root, set “permitrootlogin” as “yes”.
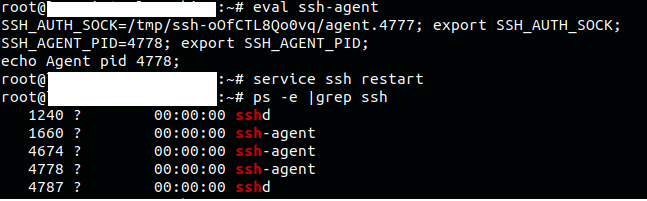
- Make sure the ssh-agent is enable and start ssh service, enter:
eval ssh-agent
service ssh restart
You can use ‘ps -e |grep ssh’ to make sure ssh-agent and sshd is running
- Get the ip address of server, enter:
ifconfig

3.4 Test connection at client
- At client, use ‘ssh [username]@[server ip]’ to connect. Make sure your security key is plugged in. The client will ask you to touch your devices.

- If you don’t touch the devices in 10 seconds, or touch with incorrect fingerprint, the client will ask you for password(set in sshd_config).

- If touched and passed the authentication, the connection will success.